
Automate Intune Tasks with Azure Automation Runbooks
Build your first Azure Automation Runbook to automate Intune tasks: managed identity auth, scripting, testing, scheduling and source control made easy.
As you all know I am a very very big fan of automation. The good thing is in almost all Microsoft products there are interfaces to do exactly that. This is also the case for Intune. In one of my last blogs I wrote about how to use PowerShell to automate things in Intune. I also mentioned Azure Automation. In this blog I want to go deeper into the topic and explain how you can use an Azure Automation Runbook to automate recurring processes in Intune.
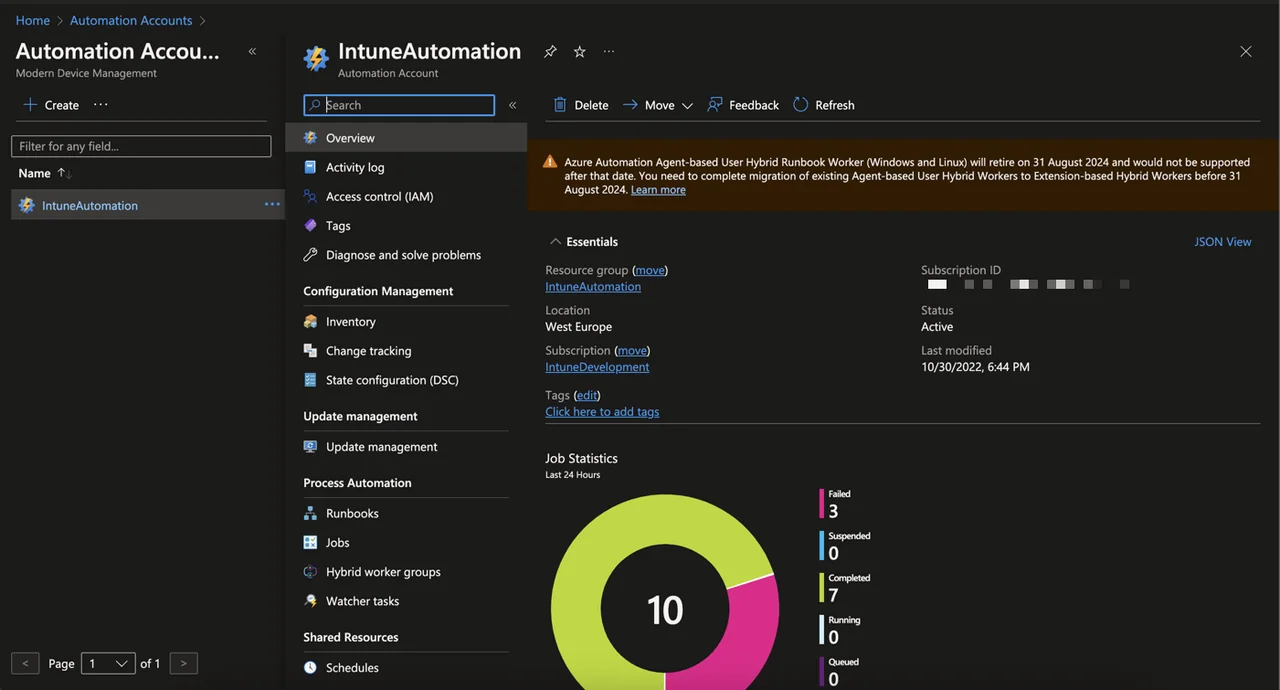
Content
- Content
- What is Azure Automation?
- How to create an Automation Account and a Runbook?
- How to authenticate to Graph using a managed Identity?
- How to authenticate to a Storage account?
- How to authenticate to a Key Vault
- How can I write a PowerShell script?
- How to test a script
- How to publish a script and create a schedule
- How to activate Source control
- Other Sources
What is an Azure Automation Runbook?
Azure Automation is a powerful Azure service, that enables you to automate repetitive and time-consuming tasks across your Azure and on-premises environments. An Azure Automation Runbook is an essential component of this service, allowing you to create, run, and manage scripts that automate processes, such as managing Intune devices, cleanups, group creation,… using the Microsoft Graph API. Runbooks can be written in various scripting languages, including PowerShell, Python, and Bash, making it easy to create automated solutions tailored to your specific needs.
How to create an Account and an Azure Automation Runbook
Create Automation Account
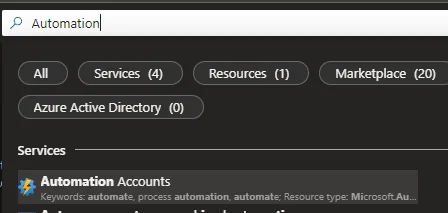
- Search for Automation Accounts
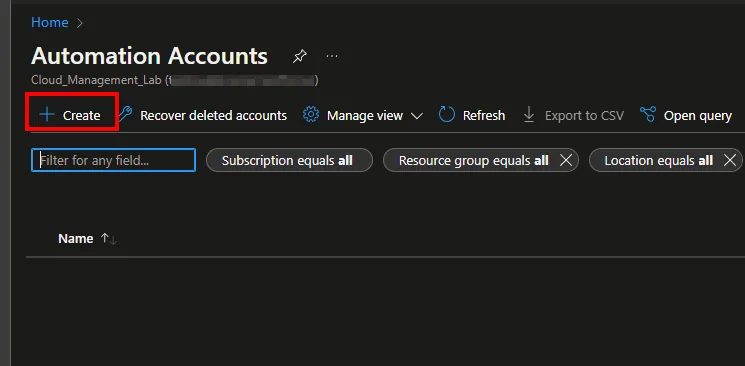
- Click + Create
- Select a Subscriptionand a Resource group
- Enter and account name and select a Region
- Click Next
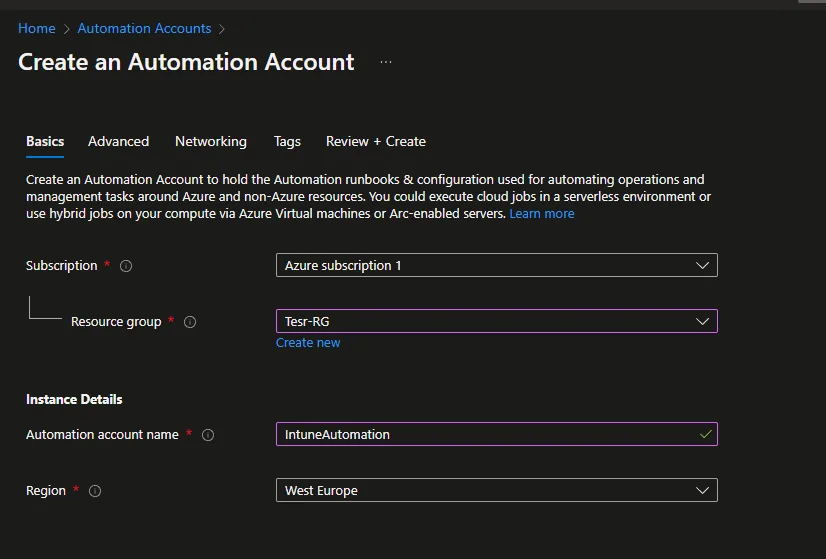
- Click Next
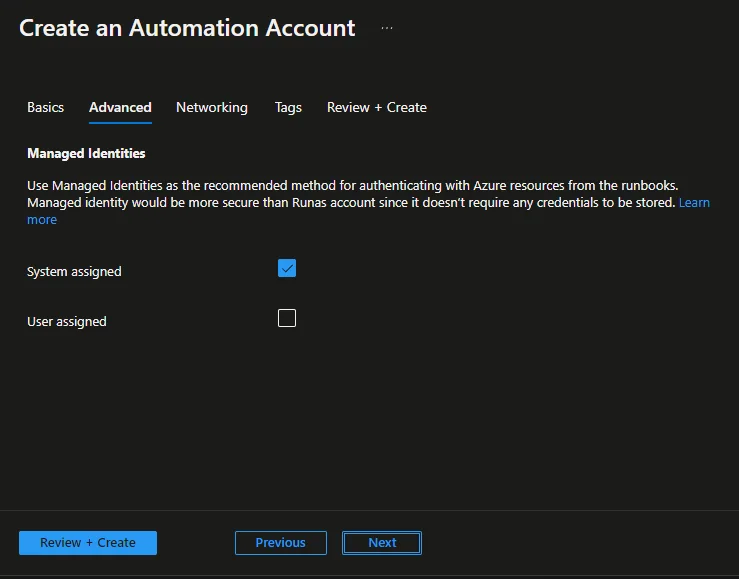
- Click Next -> Next -> Create
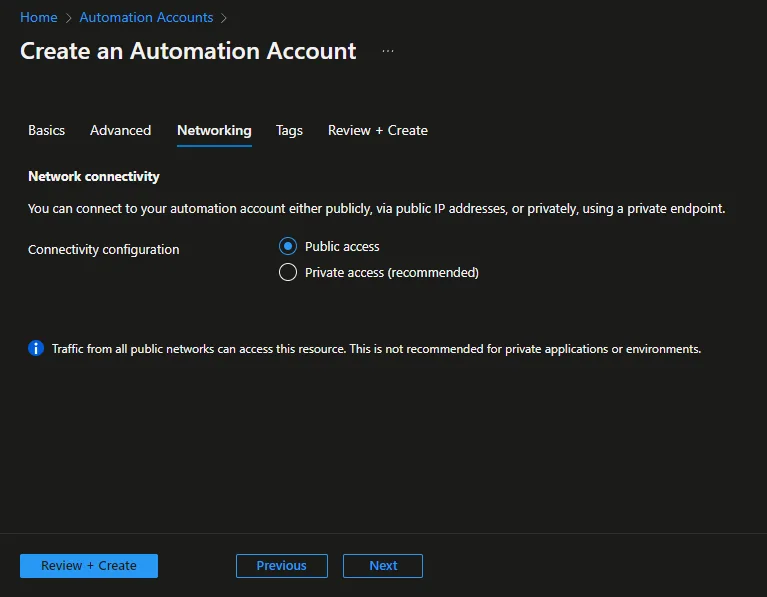
Create the Runbook
- Open the Automation Account
- Select Runbooks
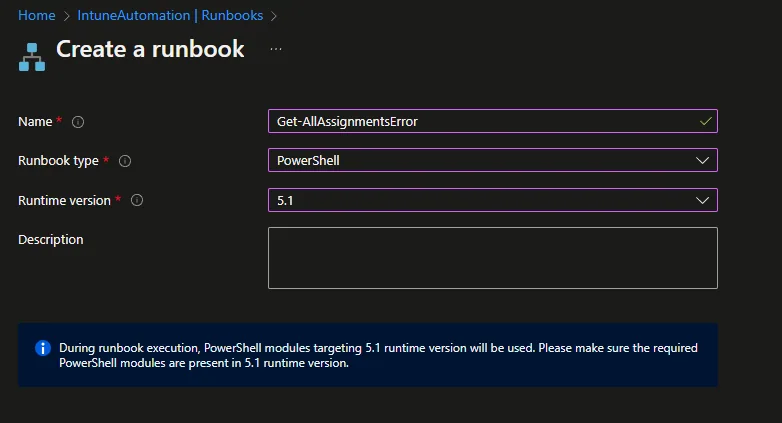
- Click + Create a runbook
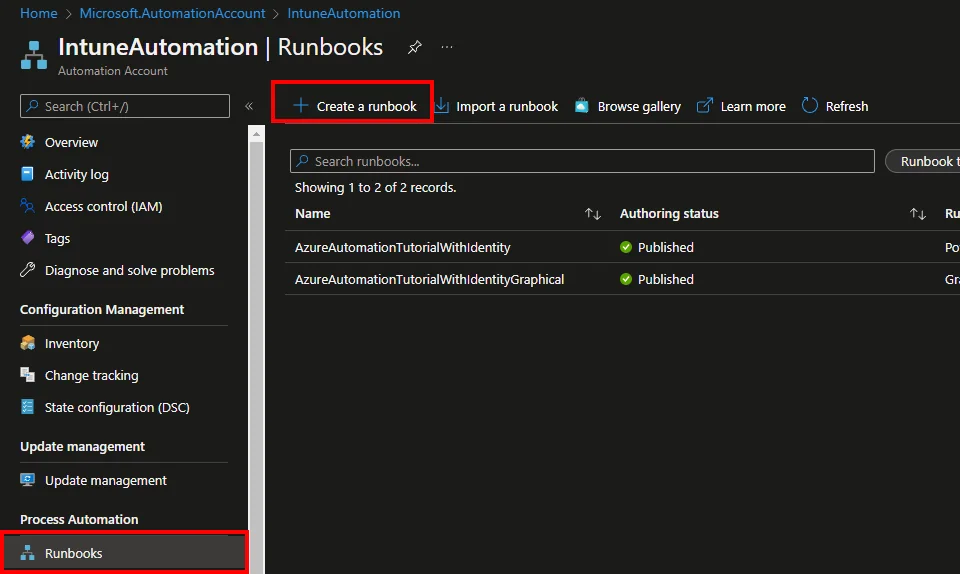
- Enter a Name
- Select PowerShell as Runbook type
- Selectthe Runtime version
- Click Create
How to authenticate to Graph using a managed Identity?
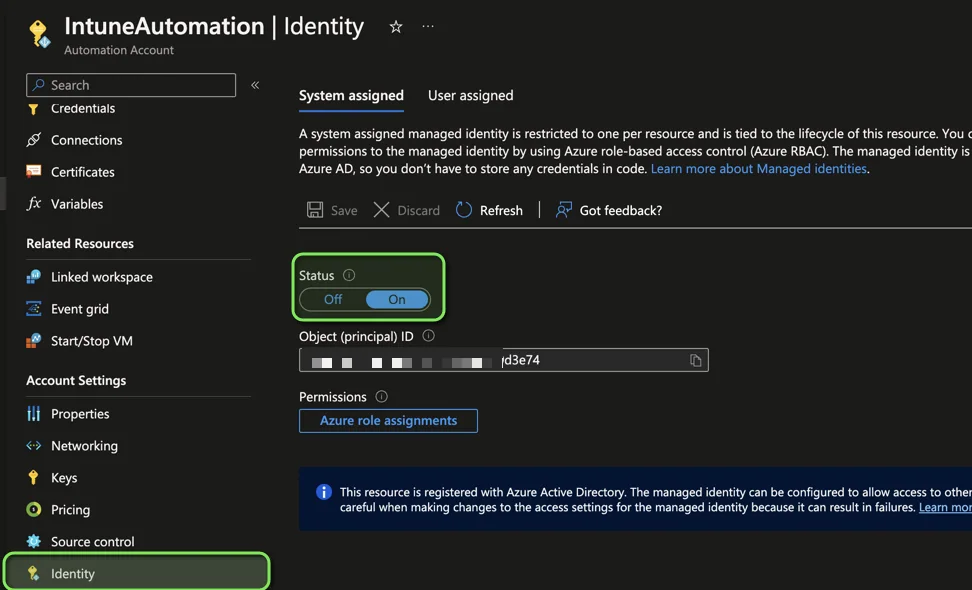
- First of all you have to enable the managed identity for your automation account
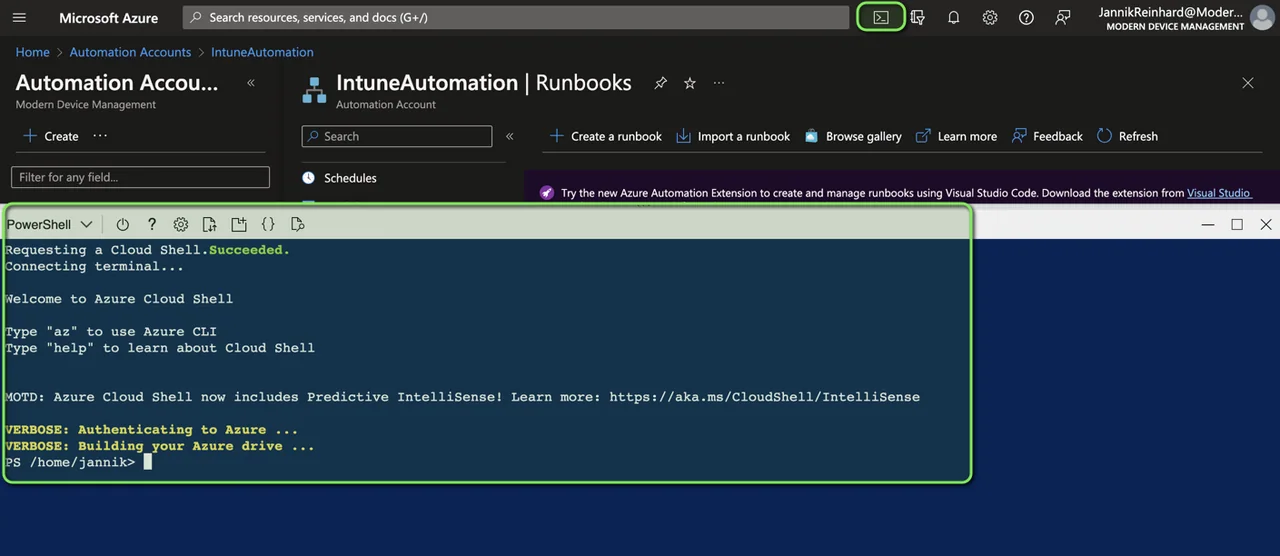
- Open an Azure PowerShell or a PowerShell local on your device
- Execute the following code:
Install-Module Microsoft.Graph -Scope CurrentUser

Connect-MgGraph -Scopes Application.Read.All, AppRoleAssignment.ReadWrite.All, RoleManagement.ReadWrite.Directory

$managedIdentityId = "Managed Identity Object ID"
$roleName = "DeviceManagementApps.Read.All"

$msgraph = Get-MgServicePrincipal -Filter "AppId eq '00000003-0000-0000-c000-000000000000'"
$role = $Msgraph.AppRoles| Where-Object {$_.Value -eq $roleName}

New-MgServicePrincipalAppRoleAssignment -ServicePrincipalId $managedIdentityId -PrincipalId $managedIdentityId -ResourceId $msgraph.Id -AppRoleId $role.Id

Disconnect-MgGraph
- Go back and select Modules
- Click + Add a module
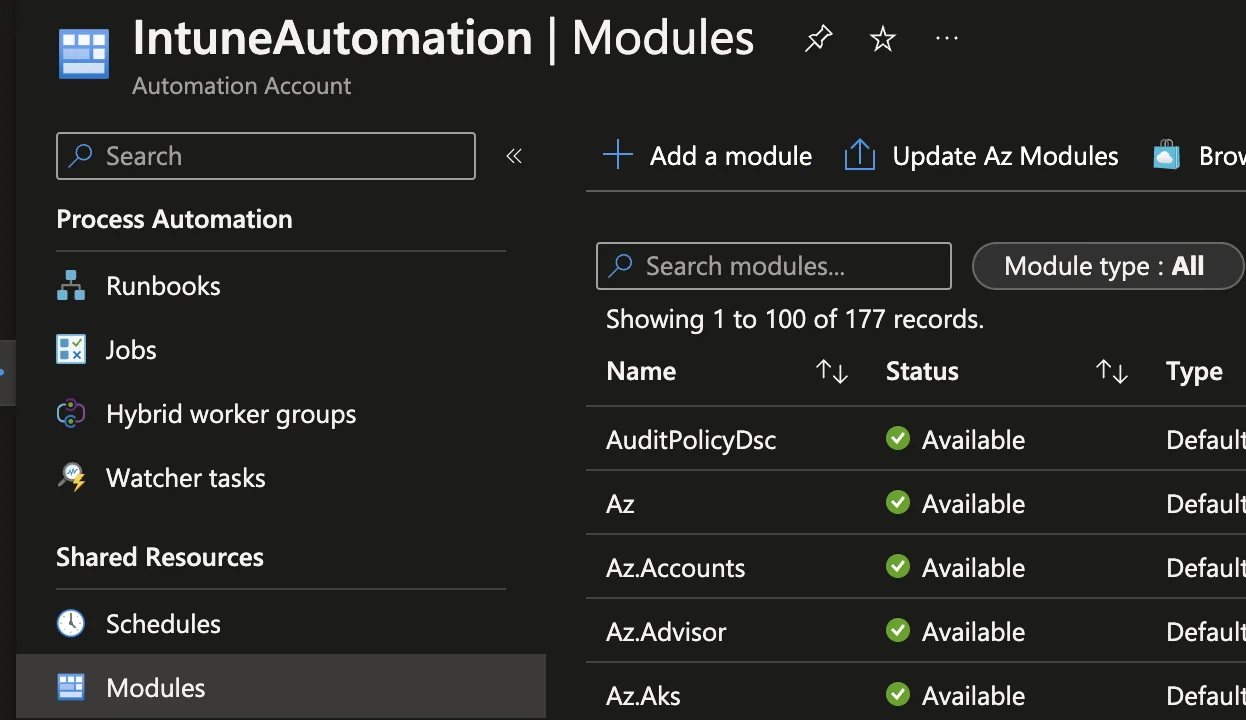
- Select PowerShell Galary
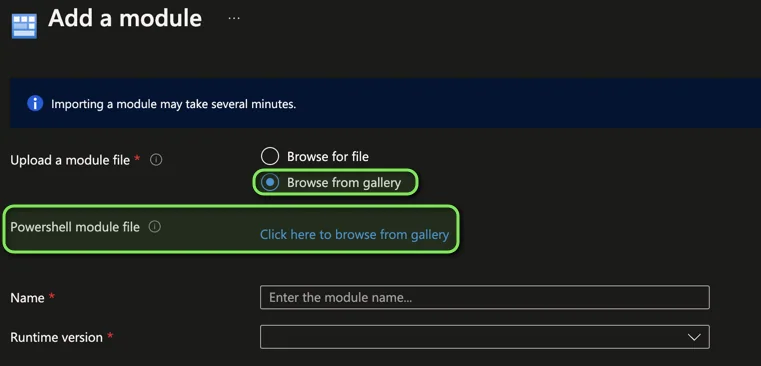
- Search and install the Graph.Authentication Module

- Now you can use the managed identity to authenticate in a very secure way to Graph
- Now you can authenticate to Graph with this code
Connect-AzAccount -Identity
$token = Get-AzAccessToken -ResourceUrl "https://graph.microsoft.com"
Connect-MgGraph -AccessToken $token.Token
How to authenticate to a Storage account?
- The steps above to enable the system-assigned identity are a prerequisite
- Make sure that you have a storage account. If not, create one
- Open an Azure PowerShell or a PowerShell local on your device
- Execute the following code:
# Define variables for your resources
$managedIdentityId = "Managed Identity Object ID"
$resourceGroupName = "<Your-Resource-Group-Name>"
$storageAccountName = "<Your-Storage-Account-Name>"

$storageAccount = Get-AzStorageAccount -ResourceGroupName $resourceGroupName -Name $storageAccountName

New-AzRoleAssignment -ObjectId $managedIdentityId -RoleDefinitionName "Storage Blob Data Contributor" -Scope $storageAccount.Id- Now you can get an storage account context with this command:
$Context = New-AzStorageContext -StorageAccountName $storageAccountNameHow to authenticate to a Key Vault
- The steps above to enable the system-assigned identity are a prerequisite
- Make sure that you have a storage account. If not, create one
- Open an Azure PowerShell or a PowerShell local on your device
- Execute the following code:
# Define variables for your resources
$managedIdentityId = "Managed Identity Object ID"
$resourceGroupName = "<Your-Resource-Group-Name>"
$keyVaultName = "<Your-Storage-Account-Name>"

$keyVault = Get-AzKeyVault -ResourceGroupName $resourceGroupName -Name $keyVaultName

New-AzRoleAssignment -ObjectId $managedIdentityId -RoleDefinitionName "Reader" -Scope $keyVault.ResourceId

Set-AzKeyVaultAccessPolicy -VaultName $keyVaultName -ResourceGroupName $resourceGroupName -ObjectId $managedIdentityId -PermissionsToSecrets get- Now you can read the secret with the following command:
Connect-AzAccount -Identity
$secret = Get-AzKeyVaultSecret -VaultName "VaultName" -Name "SecretName" -AsPlainText
How can I write a PowerShell script?
Checkout this blog post where I explain in detail how to use PowerShell inside an Azure Automation Runbook to automate things in Intune
Script example
Here is an example script how to report all discovered apps from Intune using Azure Automation Runbooks and authenticate with managed identity.
- Install the Microsoft.Graph.Reports and Microsoft.PowerShell.Archive module
- Create a Runbook with Powershell 7.2 runtime
<#
Version: 1.0
Author: Jannik Reinhard (jannikreinhard.com)
Script: Get-GraphExportApiReport
Description:
Get a CSV Report from the Graph API
Release notes:
Version 1.0: Init
#>

# Authenticate and connect to Microsoft Graph
Connect-AzAccount -Identity
$token = Get-AzAccessToken -ResourceUrl "https://graph.microsoft.com"
Connect-MgGraph -AccessToken $token.Token

$reportName = 'DetectedAppsRawData'
$fileName = "intuneExport.csv"
$storageAccountName = ""
$containerName = ""

$body = @"
{
    "reportName": "$reportName",
    "localizationType": "LocalizedValuesAsAdditionalColumn"
}
"@


$id = (Invoke-MgGraphRequest -Method POST -Body $body -Uri https://graph.microsoft.com/beta/deviceManagement/reports/exportJobs).id
$status = (Invoke-MgGraphRequest -Uri "https://graph.microsoft.com/beta/deviceManagement/reports/exportJobs('$id')" -Method GET).status

while (-not ($status -eq 'completed')) {
    $response = Invoke-MgGraphRequest -Uri "https://graph.microsoft.com/beta/deviceManagement/reports/exportJobs('$id')" -Method Get
    $status = ($response).status
    Start-Sleep -Seconds 2
}

$localFilePath = "./$fileName"
$localFilePathZip = "./$fileName.zip"
Invoke-WebRequest -Uri $response.url -OutFile $localFilePathZip
Expand-Archive $localFilePathZip -DestinationPath $localFilePath

$Context = New-AzStorageContext -StorageAccountName $storageAccountName

$file = Get-ChildItem -Path $localFilePath -Force -Recurse -File | Select-Object -First 1
Set-AzStorageBlobContent -Force -File $file -Container $containerName -Blob $localFilePath -Context $Context -StandardBlobTier 'Hot'
How to test a script
Before you schedule it, always test the Azure Automation Runbook in the test pane to make sure the script runs cleanly.
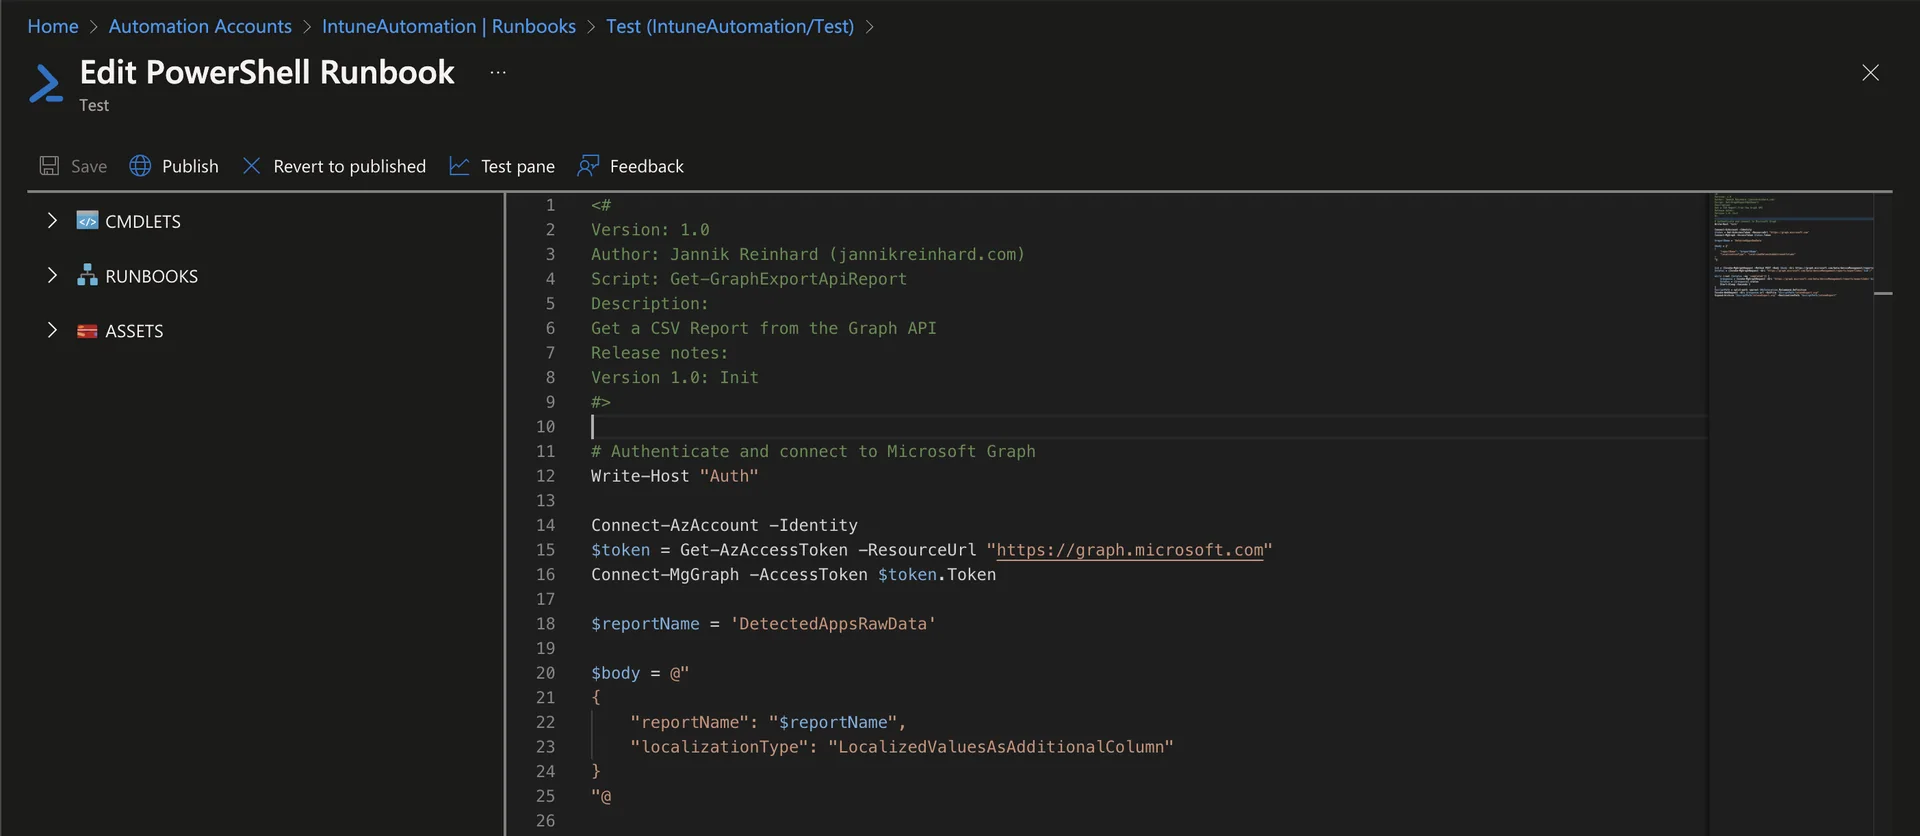
- Create a new runbook like explained above
- Insert the script into the runbook
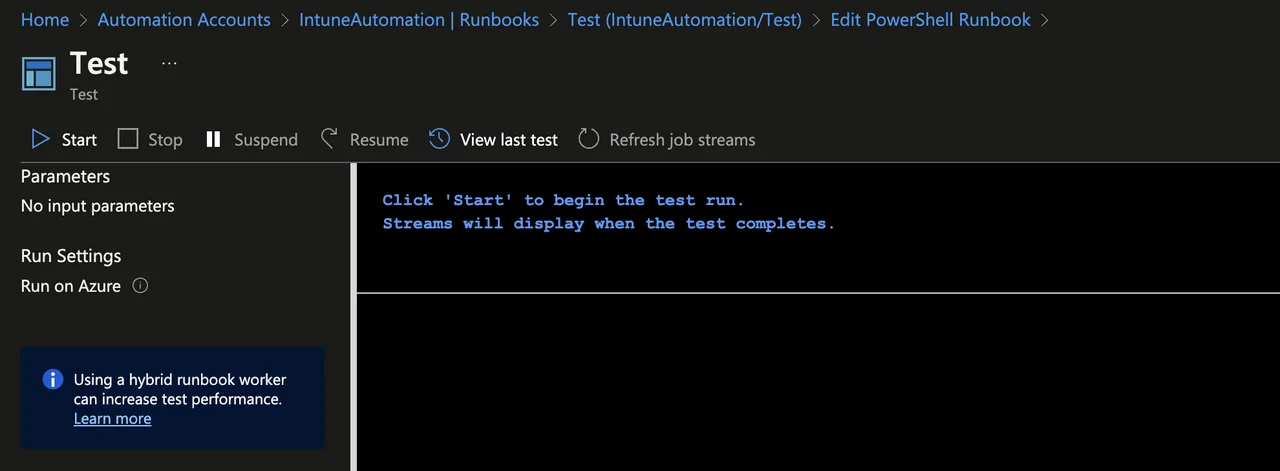
- Click Test pane
- Click Start
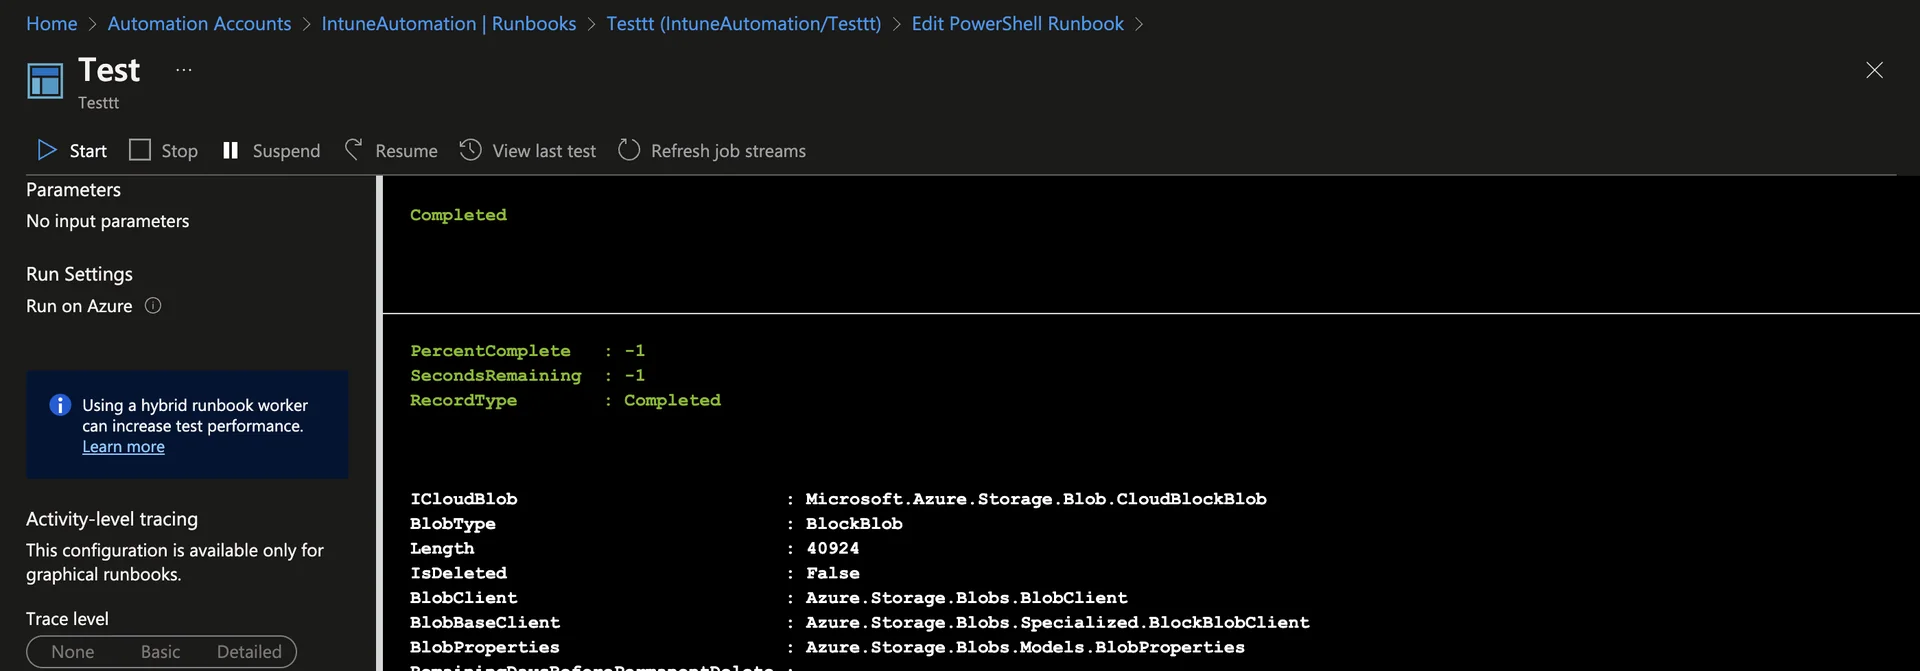
- Check if the execution is successful
How to publish a script and create a schedule
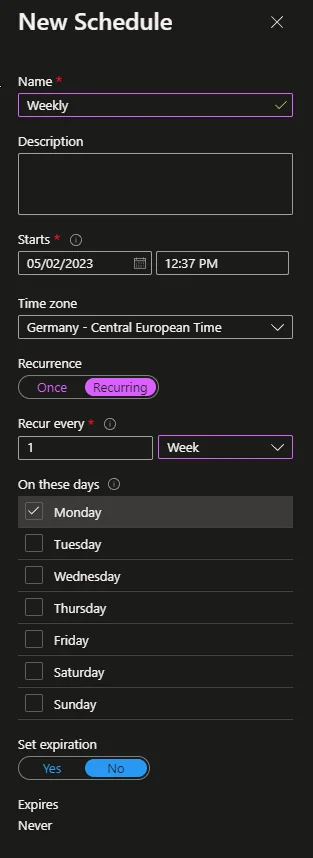
Once the Azure Automation Runbook works as expected, publish it and attach a schedule so it runs automatically.
- Click Publish

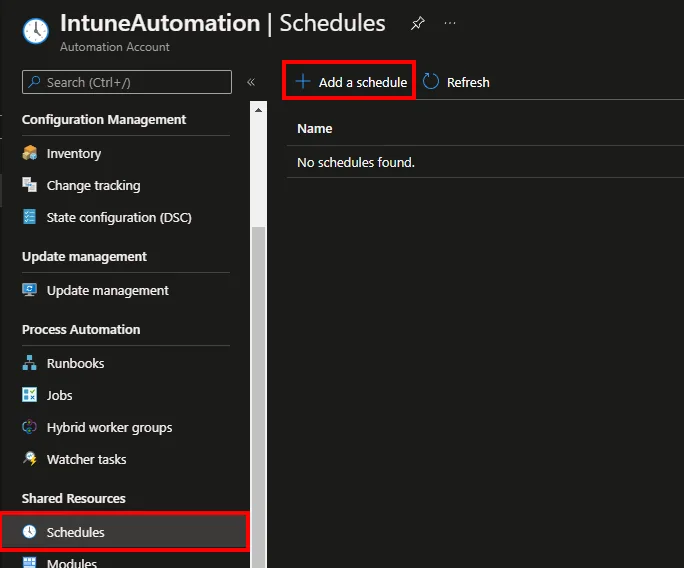
- Navigate to Schedules and click + Add a schedule
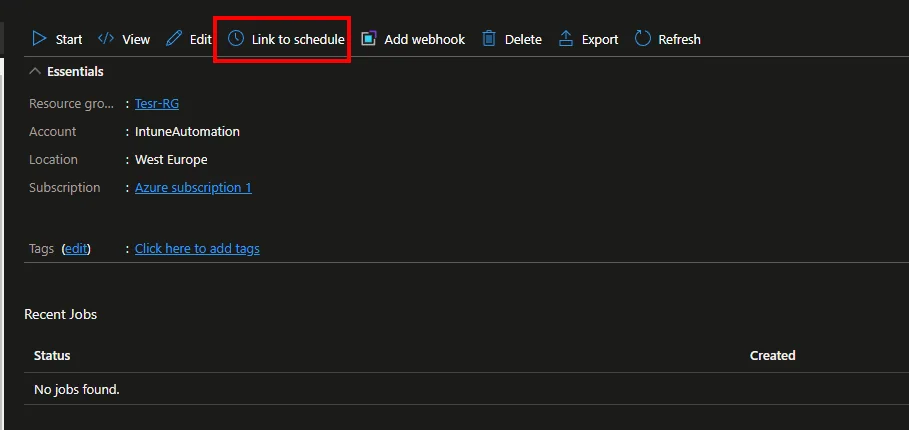
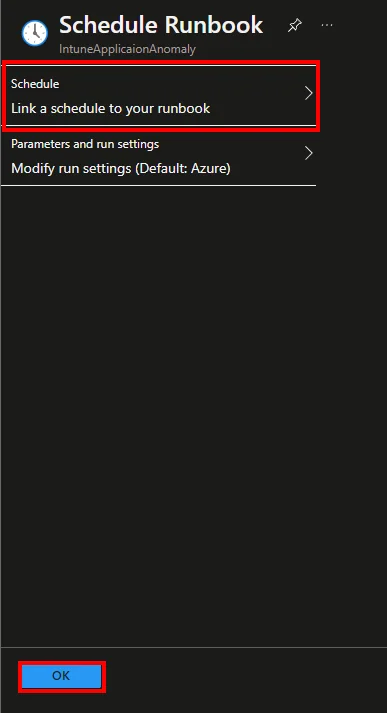
- Click Link to schedule and add the created schedule
How to activate Source control
Source control keeps every Azure Automation Runbook versioned in Git. The first step is to assign the managed identity from the automation account contributor rights to itself
- Open an Azure PowerShell or a PowerShell local on your device
- Execute the following code:
# Define variables for your resources
$managedIdentityId = "Managed Identity Object ID"
$resourceGroupName = "<Your-Resource-Group-Name>"
$automationAccountName = "<Your-Automation-Account-Name>"

$automationAccount = Get-AzResource -ResourceGroupName $resourceGroupName -ResourceType "Microsoft.Automation/automationAccounts" -Name $automationAccountName

New-AzRoleAssignment -ObjectId $managedIdentityId -RoleDefinitionName "Contributor" -Scope $automationAccountName.Id- Create an Azure DevOps Project and a Repository
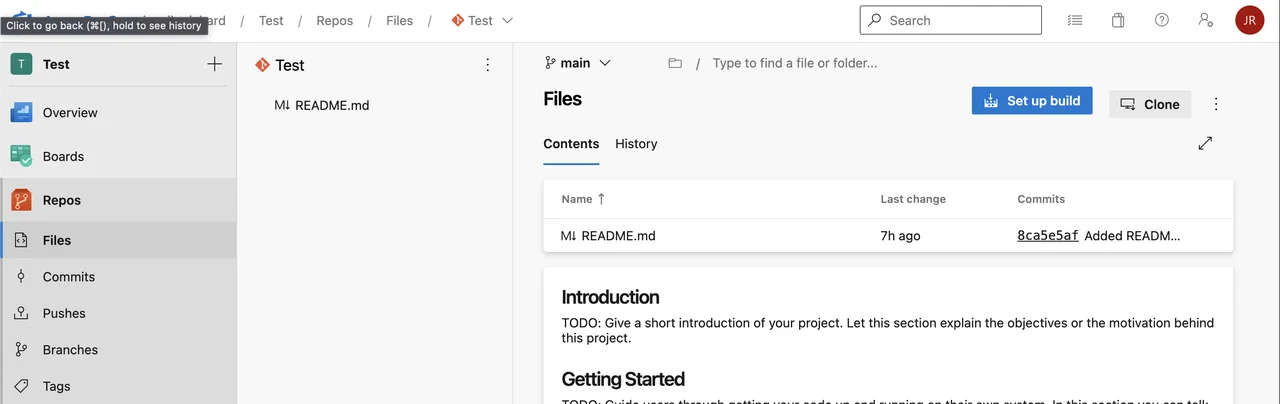
- Navigate to Source control and click +Add
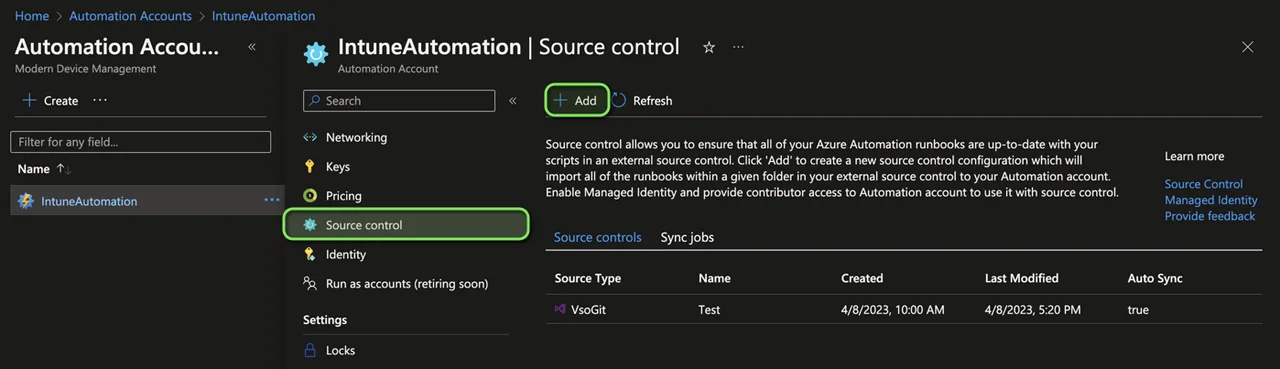
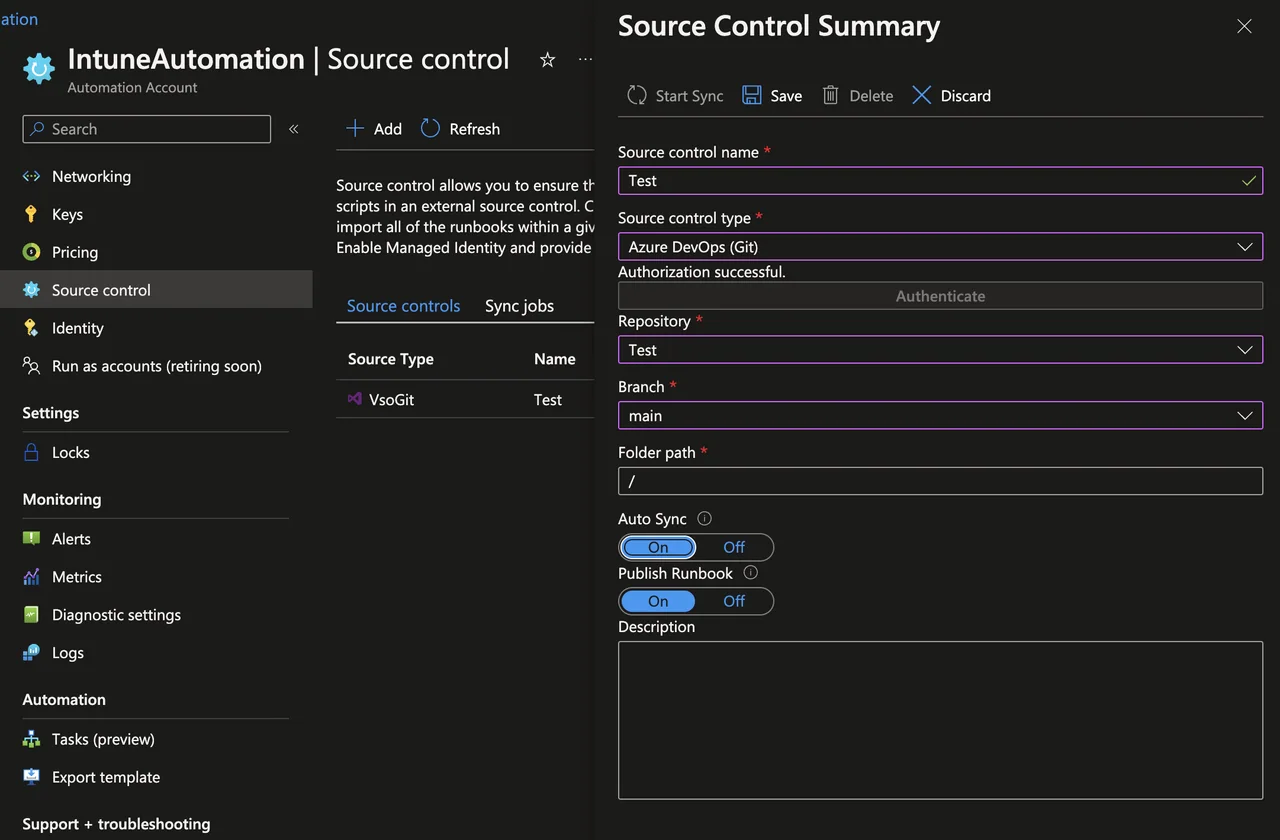
- Select your Organization and authenticate
- Select the Repository and the Branch
- Click Save
- Place a Powershell script in the repository
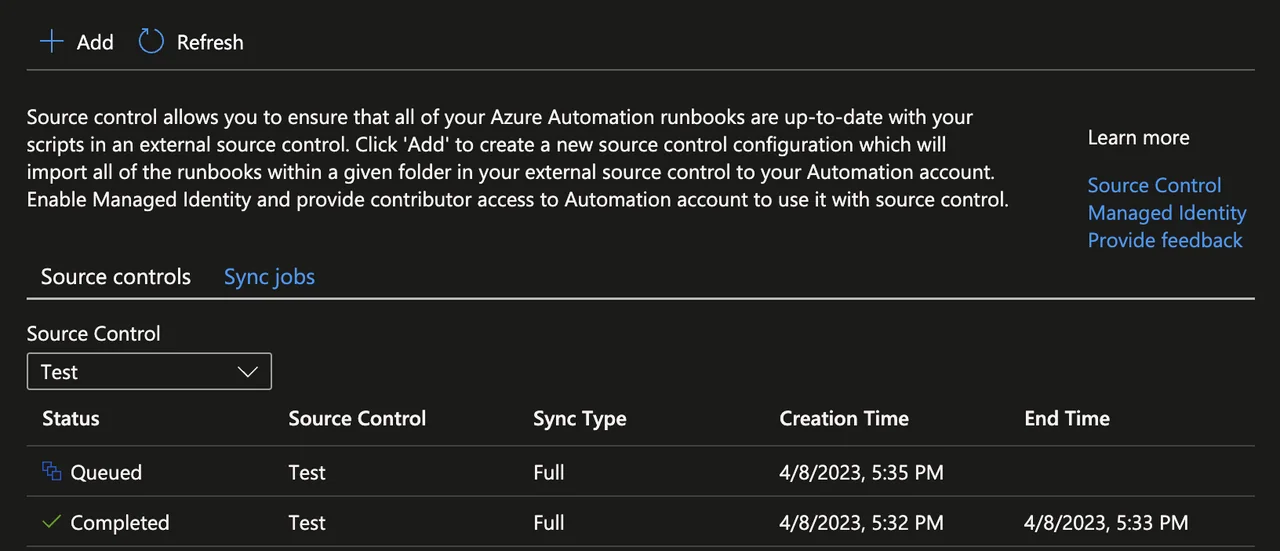
- Click on the Source control entry and click start sync
- Check the Status
With this you now have everything you need to build your first Azure Automation Runbook and automate recurring Intune tasks end to end. If you want to dig deeper into scripting, check out my guide on how to create a PowerShell script to automate tasks in Intune, and read the official Microsoft Learn documentation on Azure Automation Runbook types for more details.