
Intune-Aufgaben mit Runbooks automatisieren
Erfahre, wie du Intune mit Azure Automation Runbooks, Managed Identity, Microsoft Graph, Zeitplänen und Source Control automatisierst.
Wie ihr alle wisst, bin ich ein sehr, sehr großer Fan von Automatisierung. Das Gute daran ist, dass es in fast allen Microsoft-Produkten Schnittstellen gibt, um genau das zu tun. Das gilt auch für Intune. In einem meiner letzten Blogs habe ich darüber geschrieben, wie man PowerShell nutzt, um Aufgaben in Intune zu automatisieren. Ich habe dabei auch Azure Automation erwähnt. In diesem Blog möchte ich tiefer in das Thema einsteigen und erklären, wie du Azure Automation nutzen kannst, um wiederkehrende Prozesse zu automatisieren.
Inhalt
- Inhalt
- Was ist Azure Automation?
- Wie erstellt man ein Automation Account und ein Runbook?
- Wie authentifiziert man sich mit einer Managed Identity an Graph?
- Wie authentifiziert man sich an einem Storage Account?
- Wie authentifiziert man sich an einem Key Vault?
- Wie schreibe ich ein PowerShell-Skript?
- Wie testet man ein Skript
- Wie veröffentlicht man ein Skript und erstellt einen Zeitplan
- Wie aktiviert man Source Control
- Weitere Quellen
Was ist Azure Automation?
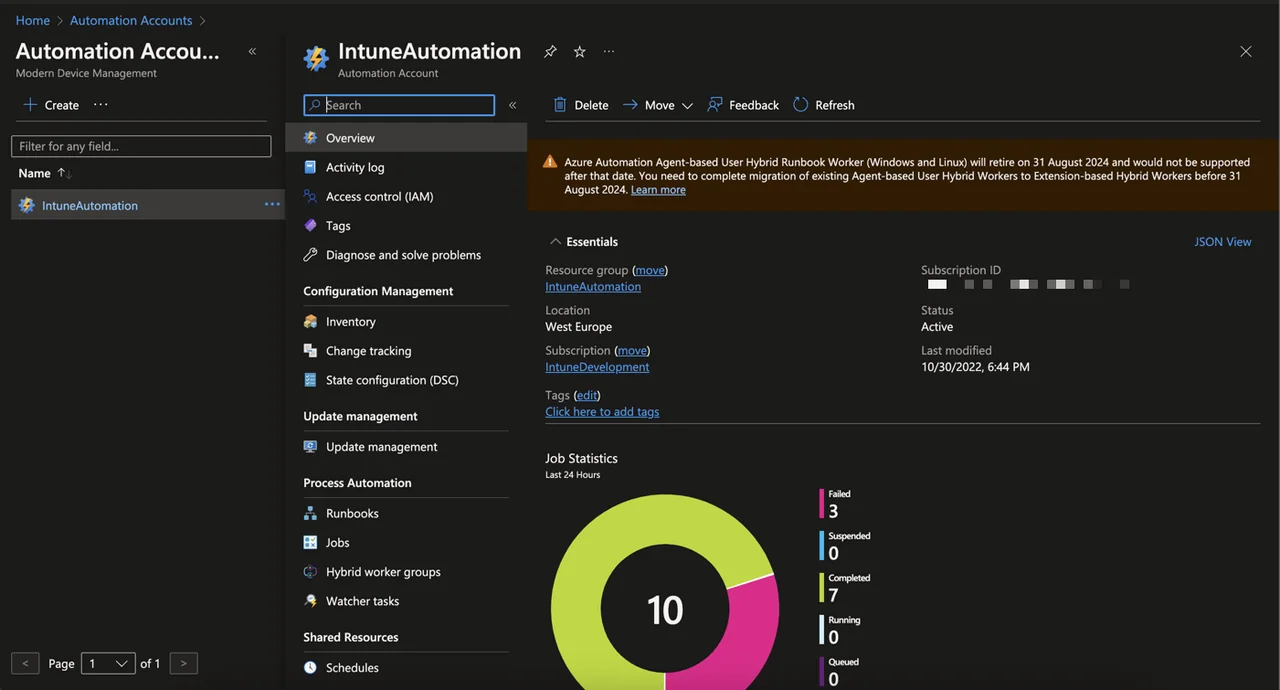
Azure Automation ist ein leistungsstarker Azure-Dienst, mit dem du sich wiederholende und zeitaufwändige Aufgaben in deinen Azure- und On-Premises-Umgebungen automatisieren kannst. Azure Automation Runbooks sind eine wesentliche Komponente dieses Dienstes. Sie ermöglichen es dir, Skripte zu erstellen, auszuführen und zu verwalten, die Prozesse automatisieren – etwa das Verwalten von Intune-Geräten, Bereinigungen, das Erstellen von Gruppen und vieles mehr – unter Verwendung der Microsoft Graph API. Runbooks können in verschiedenen Skriptsprachen geschrieben werden, darunter PowerShell, Python und Bash, wodurch sich problemlos automatisierte Lösungen erstellen lassen, die genau auf deine Bedürfnisse zugeschnitten sind.
Wie erstellt man ein Automation Account und ein Runbook?
Automation Account erstellen
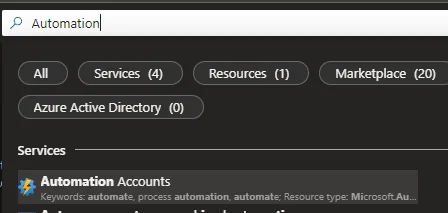
- Suche nach Automation Accounts
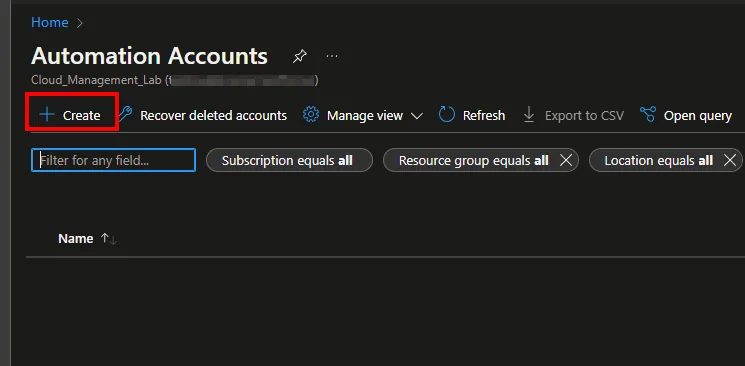
- Klicke auf + Create
- Wähle ein Subscriptionund eine Resource group
- Gib einen Account-Namen ein und wähle eine Region
- Klicke auf Next
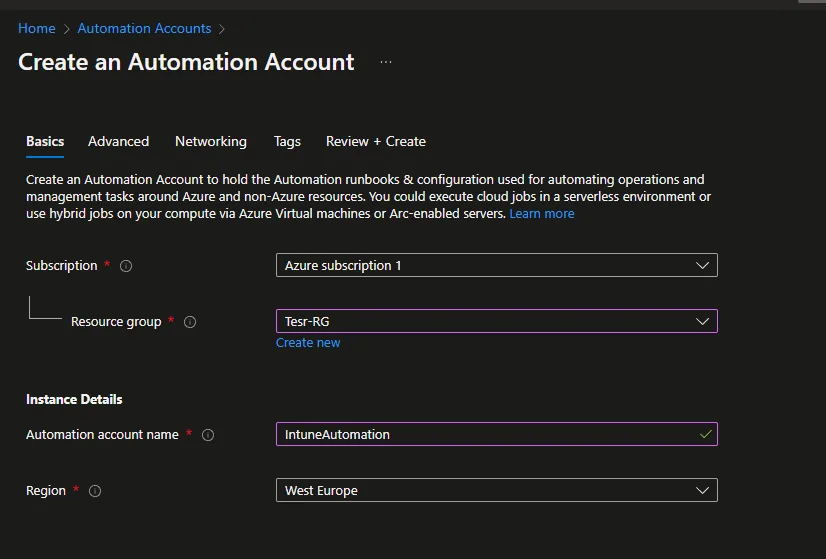
- Klicke auf Next
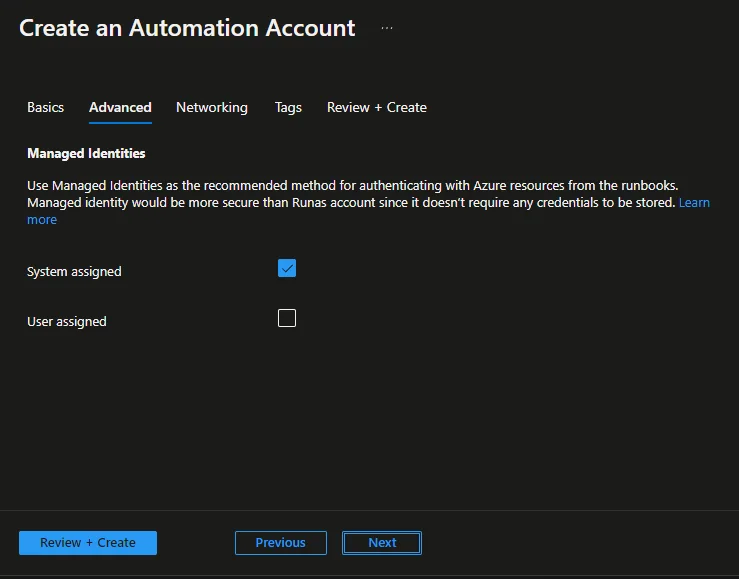
- Klicke auf Next -> Next -> Create
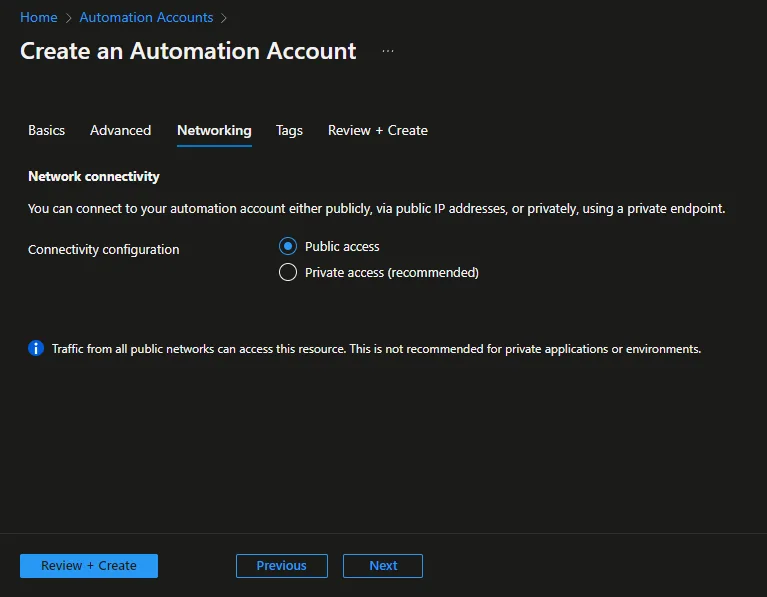
Das Runbook erstellen
- Öffne das Automation Account
- Wähle Runbooks
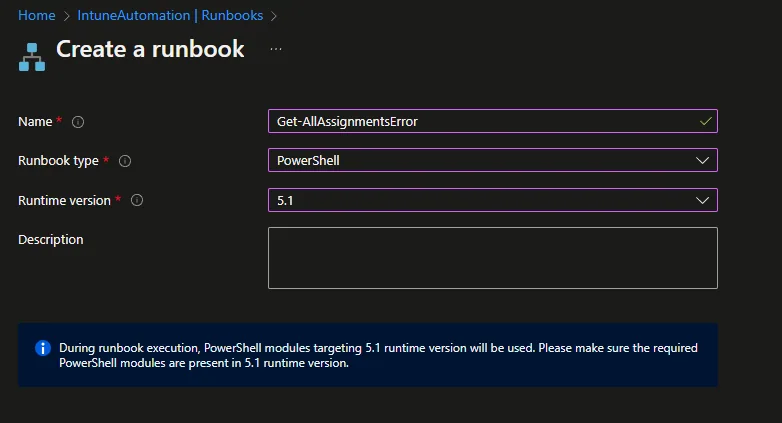
- Klicke auf + Create a runbook
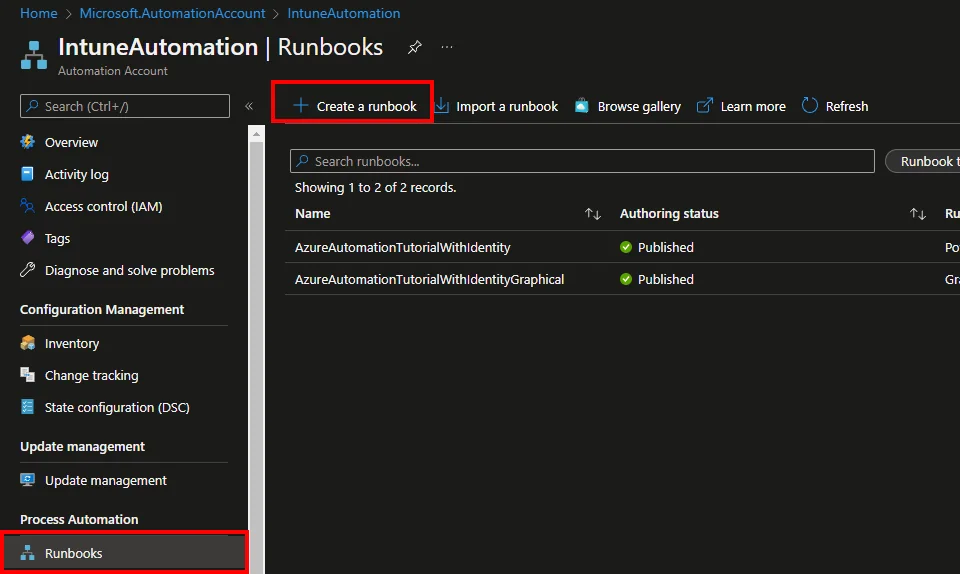
- Gib einen Namen ein
- Wähle PowerShell als Runbook-Typ
- Wähle die Runtime-Version
- Klicke auf Create
Wie authentifiziert man sich mit einer Managed Identity an Graph?
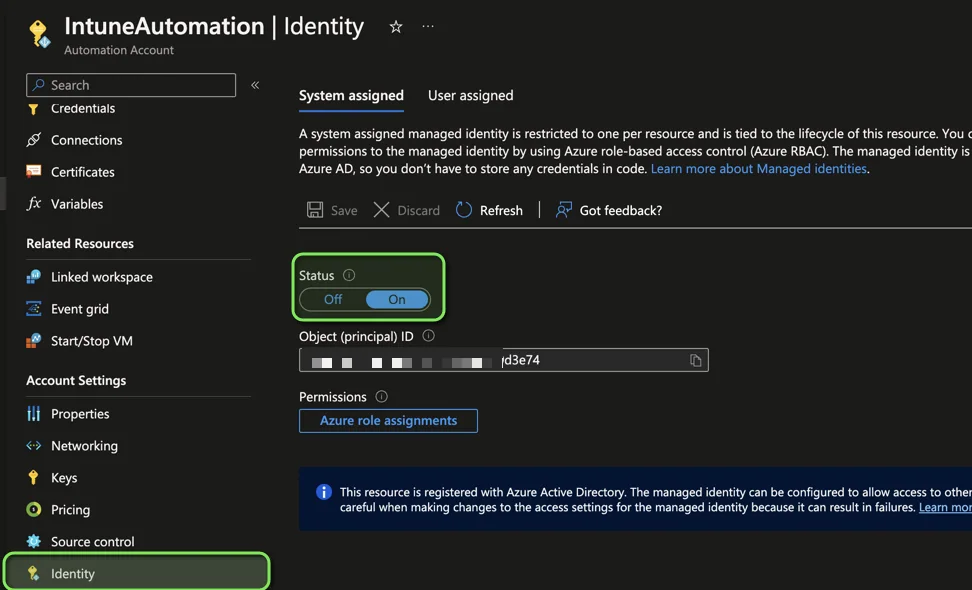
- Zunächst musst du die Managed Identity für dein Automation Account aktivieren
- Öffne eine Azure PowerShell oder eine PowerShell lokal auf deinem Gerät
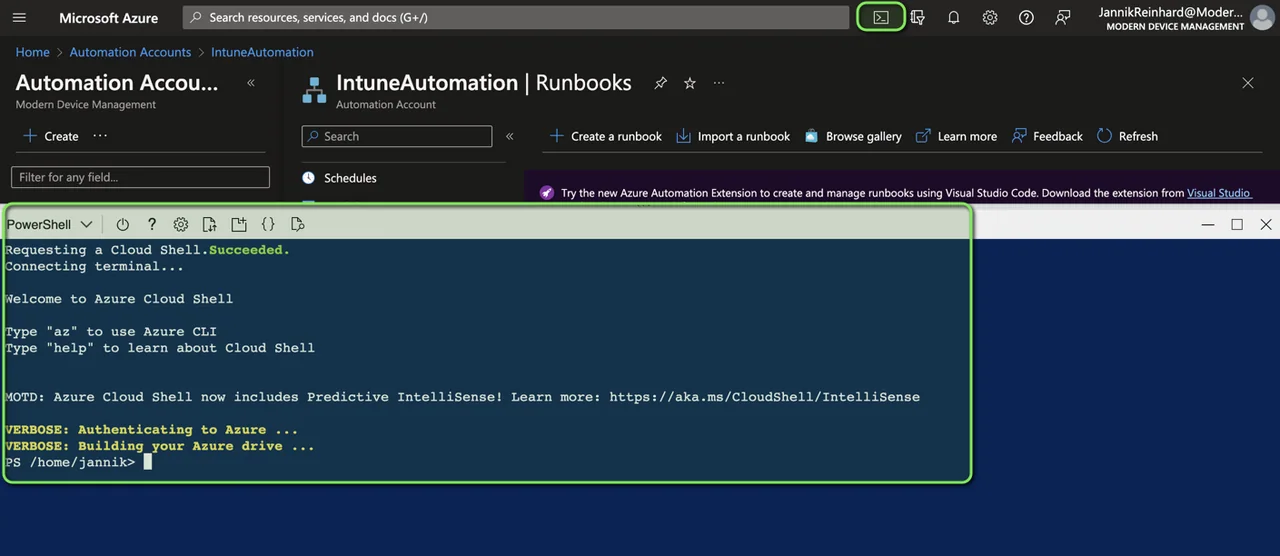
- Führe den folgenden Code aus:
Install-Module Microsoft.Graph -Scope CurrentUser

Connect-MgGraph -Scopes Application.Read.All, AppRoleAssignment.ReadWrite.All, RoleManagement.ReadWrite.Directory

$managedIdentityId = "Managed Identity Object ID"
$roleName = "DeviceManagementApps.Read.All"

$msgraph = Get-MgServicePrincipal -Filter "AppId eq '00000003-0000-0000-c000-000000000000'"
$role = $Msgraph.AppRoles| Where-Object {$_.Value -eq $roleName}

New-MgServicePrincipalAppRoleAssignment -ServicePrincipalId $managedIdentityId -PrincipalId $managedIdentityId -ResourceId $msgraph.Id -AppRoleId $role.Id

Disconnect-MgGraph
- Gehe zurück und wähle Modules
- Klicke auf + Add a module
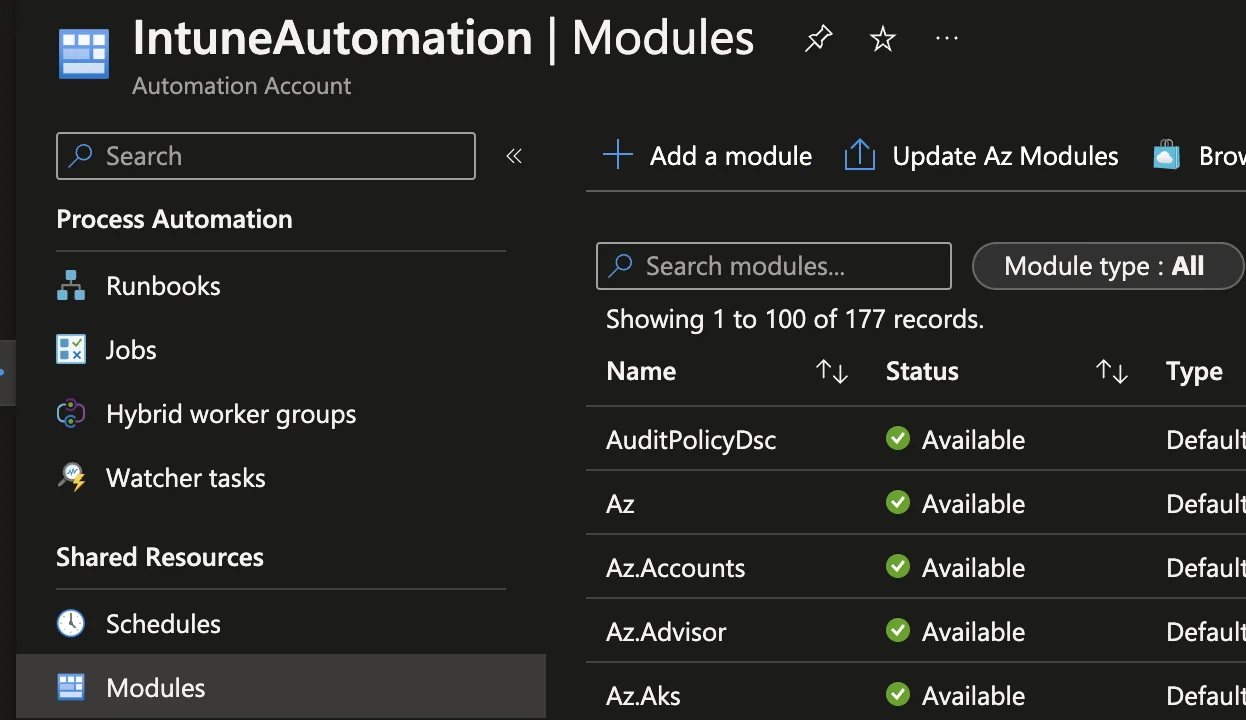
- Wähle PowerShell Galary
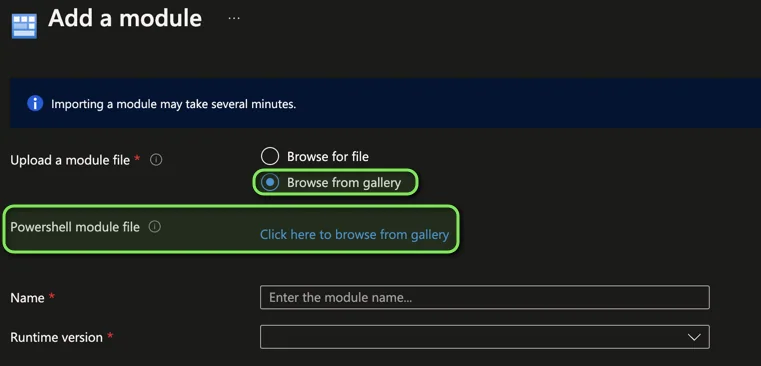
- Suche und installiere das Graph.Authentication-Modul

- Jetzt kannst du die Managed Identity nutzen, um dich auf sehr sichere Weise an Graph zu authentifizieren
- Mit diesem Code kannst du dich nun an Graph authentifizieren
Connect-AzAccount -Identity
$token = Get-AzAccessToken -ResourceUrl "https://graph.microsoft.com"
Connect-MgGraph -AccessToken $token.Token
Wie authentifiziert man sich an einem Storage Account?
- Die oben beschriebenen Schritte zur Aktivierung der system-assigned Identity sind Voraussetzung
- Stelle sicher, dass du ein Storage Account hast. Falls nicht, erstelle eines
- Öffne eine Azure PowerShell oder eine PowerShell lokal auf deinem Gerät
- Führe den folgenden Code aus:
# Define variables for your resources
$managedIdentityId = "Managed Identity Object ID"
$resourceGroupName = "<Your-Resource-Group-Name>"
$storageAccountName = "<Your-Storage-Account-Name>"

$storageAccount = Get-AzStorageAccount -ResourceGroupName $resourceGroupName -Name $storageAccountName

New-AzRoleAssignment -ObjectId $managedIdentityId -RoleDefinitionName "Storage Blob Data Contributor" -Scope $storageAccount.Id- Jetzt kannst du mit diesem Befehl einen Storage-Account-Kontext abrufen:
$Context = New-AzStorageContext -StorageAccountName $storageAccountNameWie authentifiziert man sich an einem Key Vault?
- Die oben beschriebenen Schritte zur Aktivierung der system-assigned Identity sind Voraussetzung
- Stelle sicher, dass du ein Storage Account hast. Falls nicht, erstelle eines
- Öffne eine Azure PowerShell oder eine PowerShell lokal auf deinem Gerät
- Führe den folgenden Code aus:
# Define variables for your resources
$managedIdentityId = "Managed Identity Object ID"
$resourceGroupName = "<Your-Resource-Group-Name>"
$keyVaultName = "<Your-Storage-Account-Name>"

$keyVault = Get-AzKeyVault -ResourceGroupName $resourceGroupName -Name $keyVaultName

New-AzRoleAssignment -ObjectId $managedIdentityId -RoleDefinitionName "Reader" -Scope $keyVault.ResourceId

Set-AzKeyVaultAccessPolicy -VaultName $keyVaultName -ResourceGroupName $resourceGroupName -ObjectId $managedIdentityId -PermissionsToSecrets get- Jetzt kannst du das Secret mit dem folgenden Befehl auslesen:
Connect-AzAccount -Identity
$secret = Get-AzKeyVaultSecret -VaultName "VaultName" -Name "SecretName" -AsPlainText
Wie schreibe ich ein PowerShell-Skript?
Schau dir diesen Blogbeitrag an, in dem ich im Detail erkläre, wie man PowerShell nutzt, um Aufgaben in Intune zu automatisieren
https://jannikreinhard.com/how-to-create-powershell-script-to-automate-tasks-in-intune/
Skript-Beispiel
Hier ist ein Beispielskript, wie man alle erkannten Apps aus Intune mithilfe von Azure Automation Runbooks meldet und sich mit einer Managed Identity authentifiziert.
- Installiere die Module Microsoft.Graph.Reports und Microsoft.PowerShell.Archive
- Erstelle ein Runbook mit der Powershell-7.2-Runtime
<#
Version: 1.0
Author: Jannik Reinhard (jannikreinhard.com)
Script: Get-GraphExportApiReport
Description:
Get a CSV Report from the Graph API
Release notes:
Version 1.0: Init
#>

# Authenticate and connect to Microsoft Graph
Connect-AzAccount -Identity
$token = Get-AzAccessToken -ResourceUrl "https://graph.microsoft.com"
Connect-MgGraph -AccessToken $token.Token

$reportName = 'DetectedAppsRawData'
$fileName = "intuneExport.csv"
$storageAccountName = ""
$containerName = ""

$body = @"
{
    "reportName": "$reportName",
    "localizationType": "LocalizedValuesAsAdditionalColumn"
}
"@


$id = (Invoke-MgGraphRequest -Method POST -Body $body -Uri https://graph.microsoft.com/beta/deviceManagement/reports/exportJobs).id
$status = (Invoke-MgGraphRequest -Uri "https://graph.microsoft.com/beta/deviceManagement/reports/exportJobs('$id')" -Method GET).status

while (-not ($status -eq 'completed')) {
    $response = Invoke-MgGraphRequest -Uri "https://graph.microsoft.com/beta/deviceManagement/reports/exportJobs('$id')" -Method Get
    $status = ($response).status
    Start-Sleep -Seconds 2
}

$localFilePath = "./$fileName"
$localFilePathZip = "./$fileName.zip"
Invoke-WebRequest -Uri $response.url -OutFile $localFilePathZip
Expand-Archive $localFilePathZip -DestinationPath $localFilePath

$Context = New-AzStorageContext -StorageAccountName $storageAccountName

$file = Get-ChildItem -Path $localFilePath -Force -Recurse -File | Select-Object -First 1
Set-AzStorageBlobContent -Force -File $file -Container $containerName -Blob $localFilePath -Context $Context -StandardBlobTier 'Hot'
Wie testet man ein Skript
- Erstelle ein neues Runbook wie oben beschrieben
- Füge das Skript in das Runbook ein
- Klicke auf Test pane
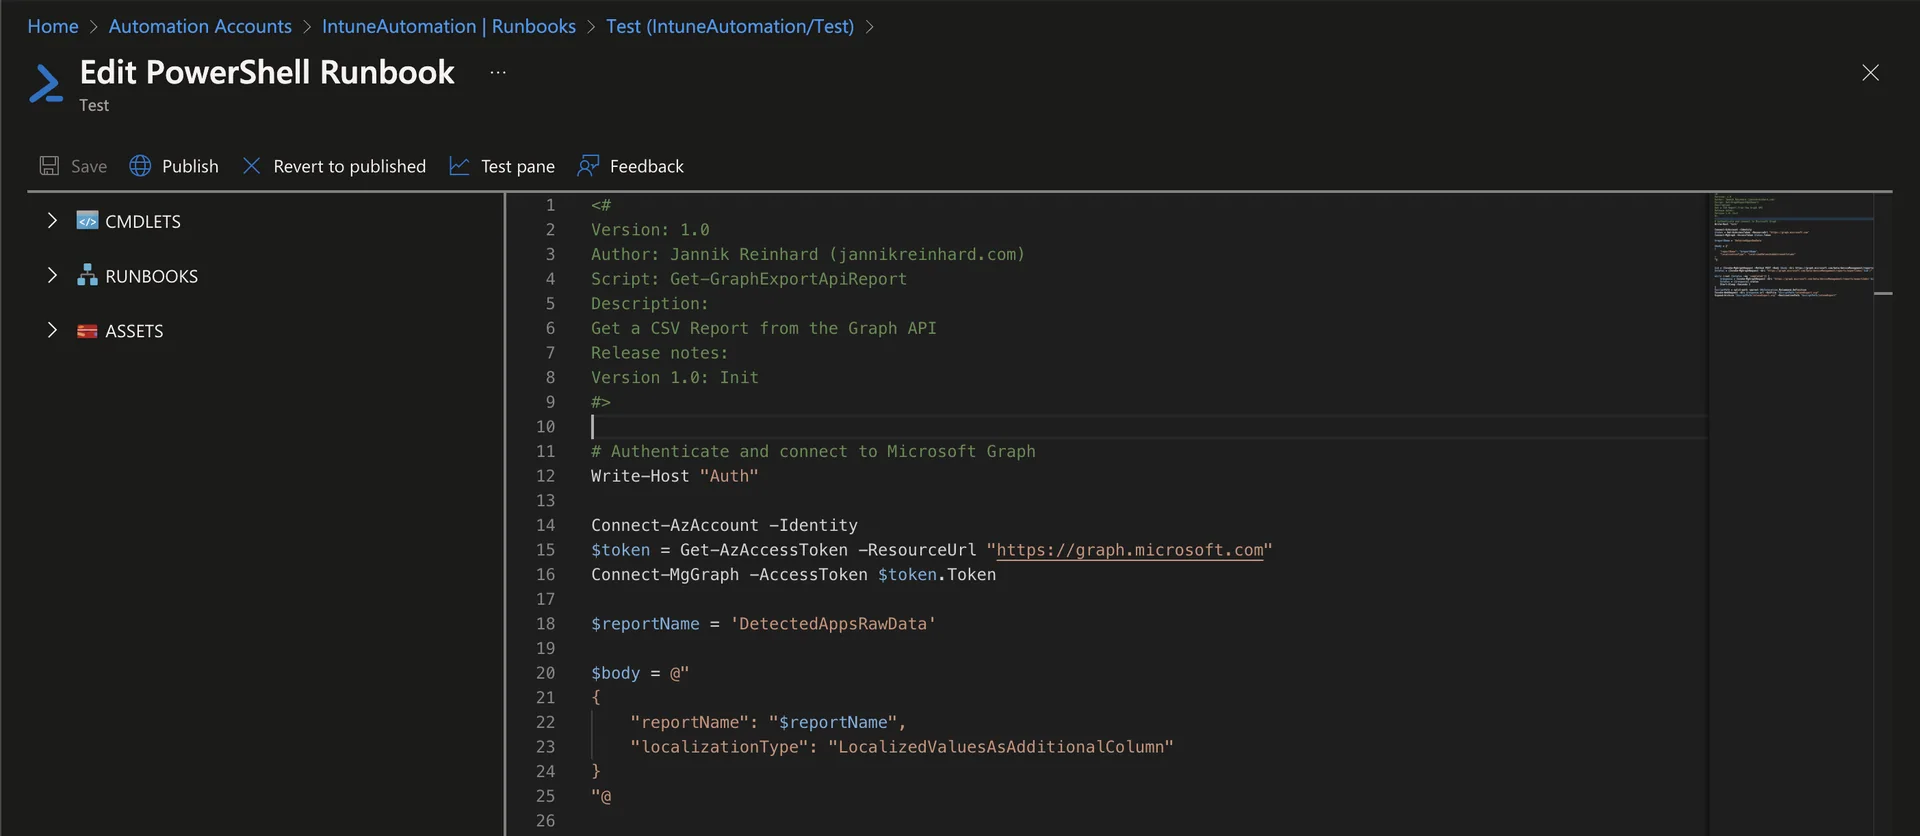
- Klicke auf Start
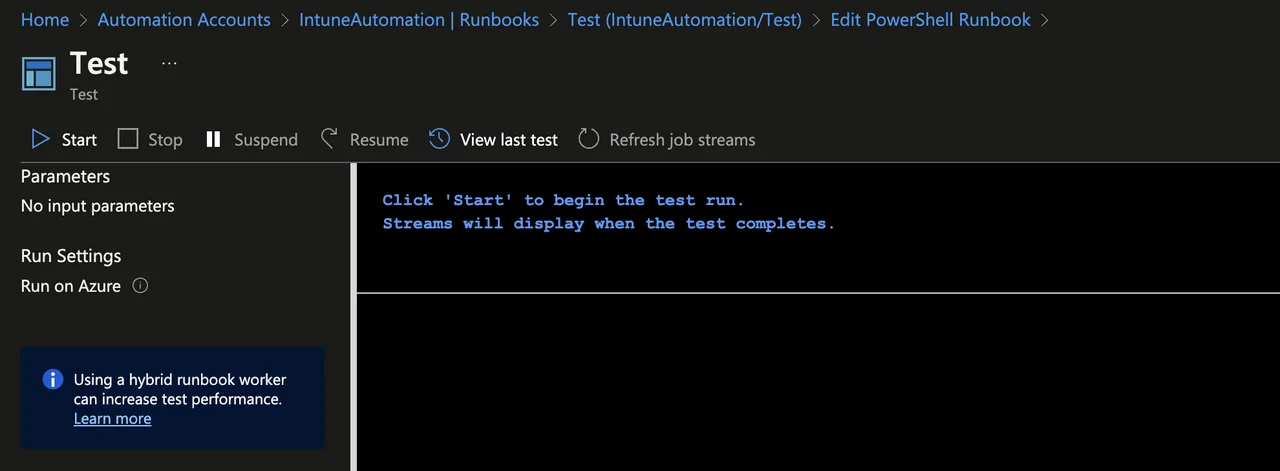
- Prüfe, ob die Ausführung erfolgreich ist
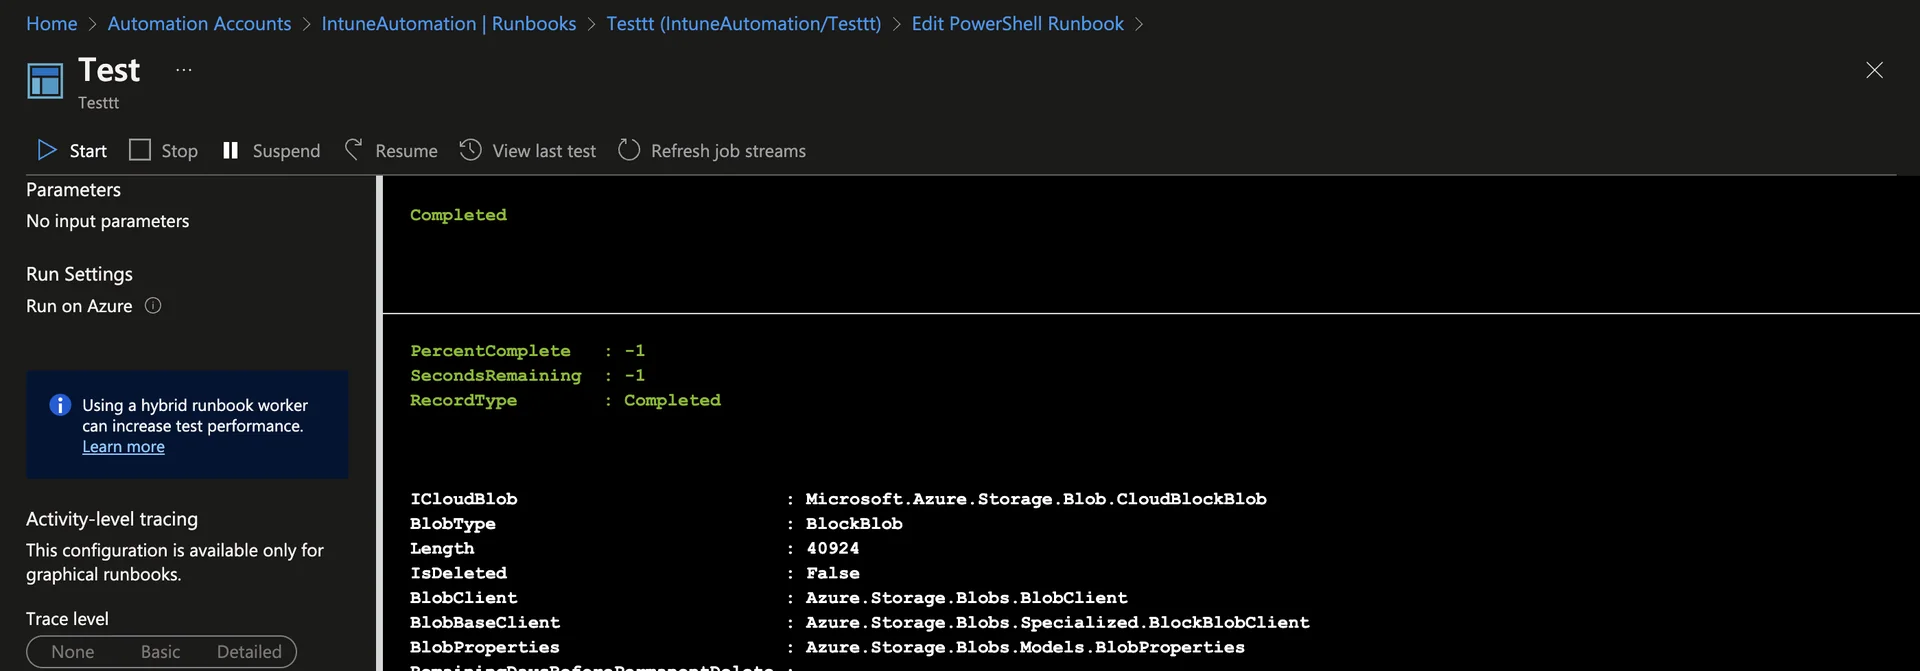
Wie veröffentlicht man ein Skript und erstellt einen Zeitplan
- Klicke auf Publish

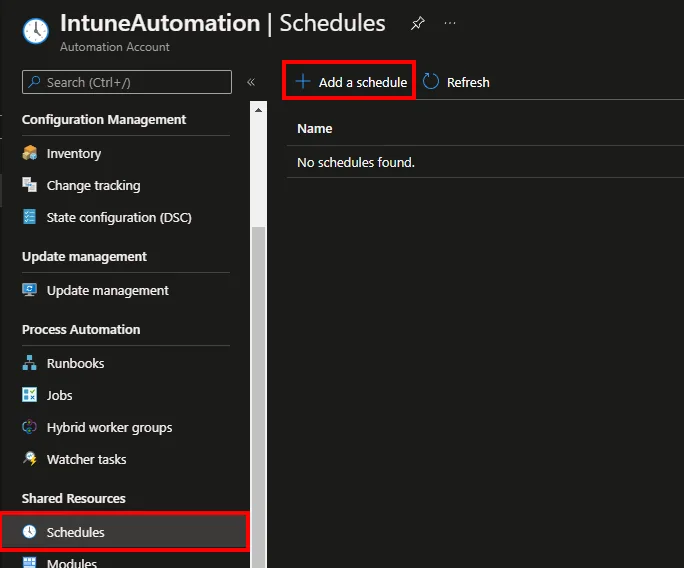
- Navigiere zu Schedules und klicke auf + Add a schedule
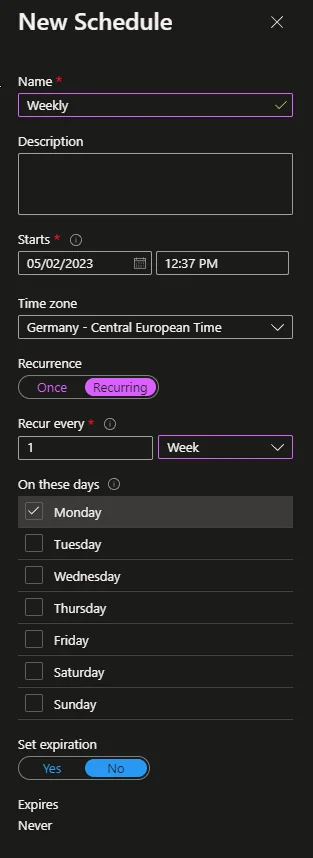
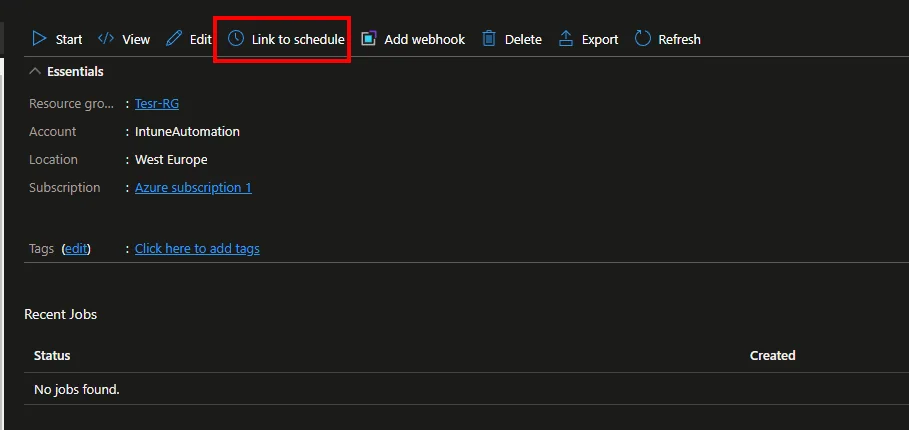
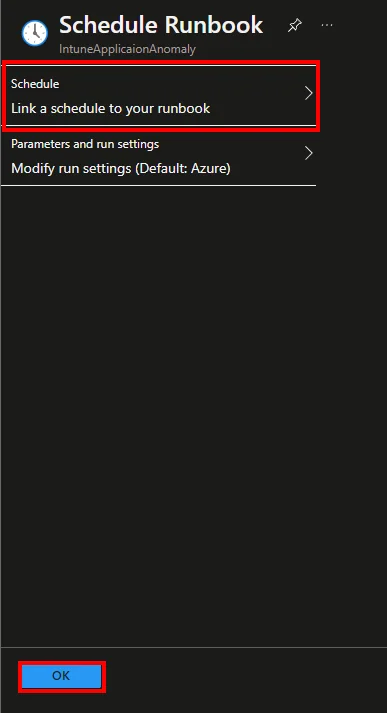
- Klicke auf Link to schedule und füge den erstellten Zeitplan hinzu
Wie aktiviert man Source Control
Der erste Schritt besteht darin, der Managed Identity des Automation Accounts Contributor-Rechte auf sich selbst zuzuweisen
- Öffne eine Azure PowerShell oder eine PowerShell lokal auf deinem Gerät
- Führe den folgenden Code aus:
# Define variables for your resources
$managedIdentityId = "Managed Identity Object ID"
$resourceGroupName = "<Your-Resource-Group-Name>"
$automationAccountName = "<Your-Automation-Account-Name>"

$automationAccount = Get-AzResource -ResourceGroupName $resourceGroupName -ResourceType "Microsoft.Automation/automationAccounts" -Name $automationAccountName

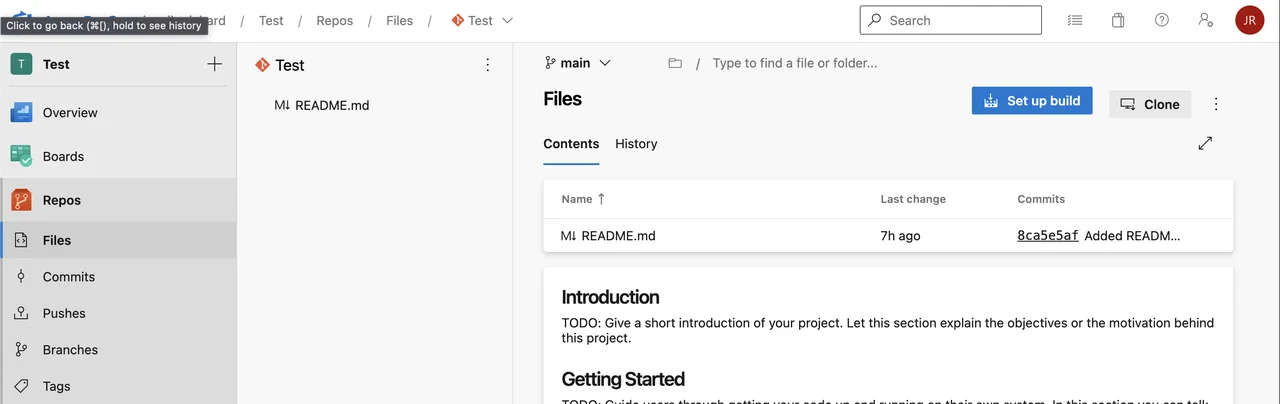
New-AzRoleAssignment -ObjectId $managedIdentityId -RoleDefinitionName "Contributor" -Scope $automationAccountName.Id- Erstelle ein Azure DevOps Projekt und ein Repository
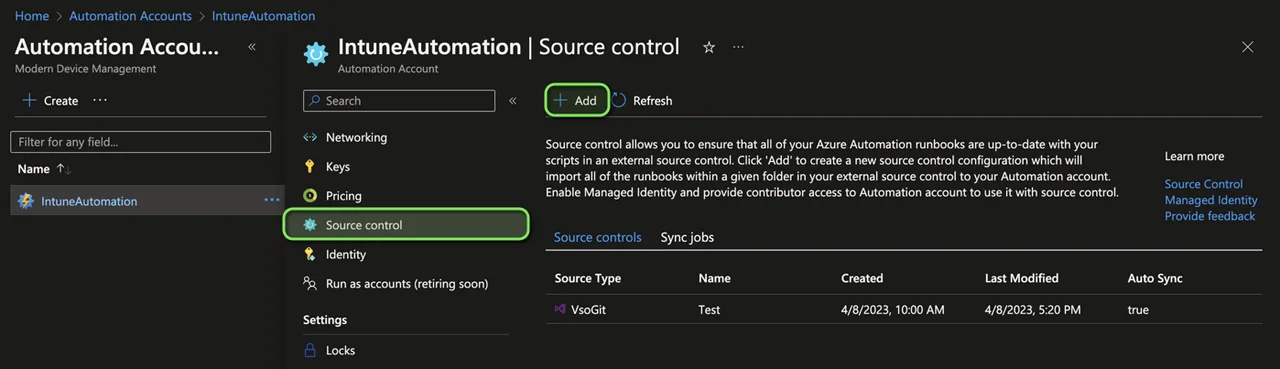
- Navigiere zu Source control und klicke auf +Add
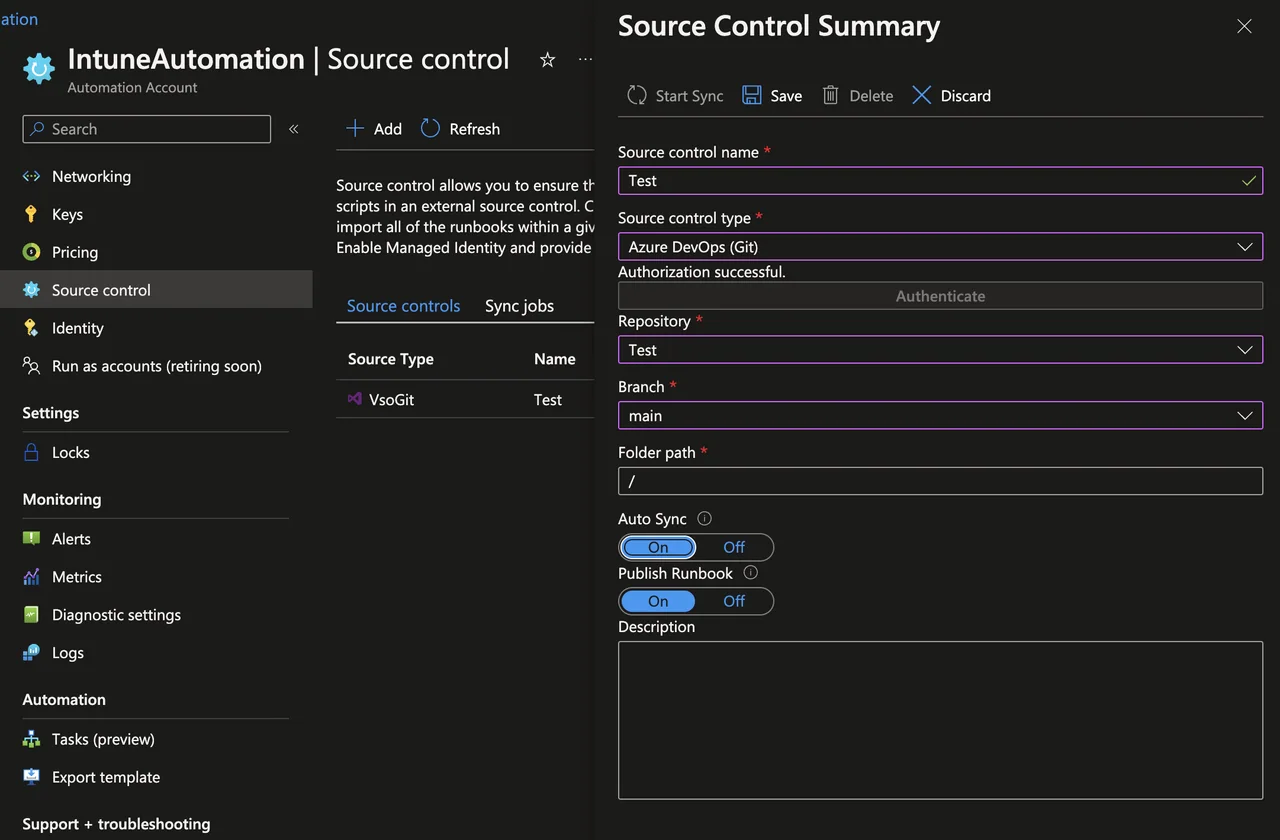
- Wähle deine Organization und authentifiziere dich
- Wähle das Repository und den Branch
- Klicke auf Save
- Lege ein Powershell-Skript im Repository ab
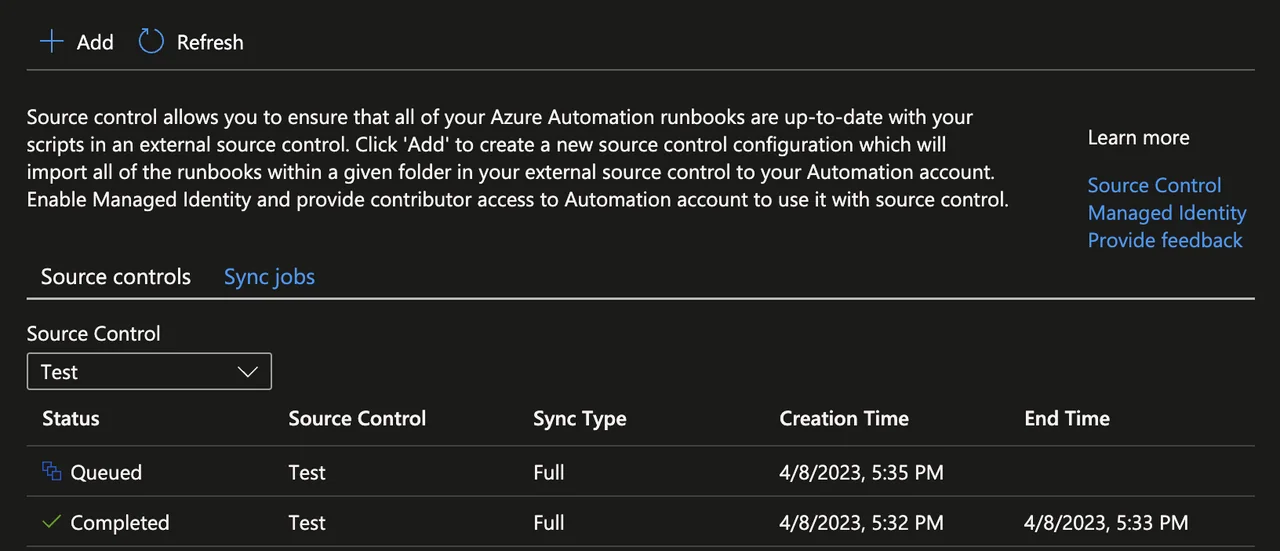
- Klicke auf den Source-control-Eintrag und klicke auf Start sync
- Prüfe den Status
Weitere Quellen
Kommentare
nice one! Thank you REINHARD.
[…] have already written a very detailed blog on how to get started with Azure Automamtion and Runbooks. It’s best to read this blog first. You have to make sure that the Graph.Authentication […]
[…] posts where I explain how to start with PowerShell to export data from Intune and how to start with azure automation to create and schedule […]