
Entra ID Gruppe mit Kiosk-Profil synchronisieren
So synchronisierst du mit Azure Automation eine Microsoft Entra ID Gruppe mit einem Intune Kiosk-Konfigurationsprofil, ohne Benutzer jedes Mal…
Beim Synchronisieren einer Azure AD Gruppe mit einem Kiosk-Konfigurationsprofil geht es vor allem darum, das Zuweisungsziel zuverlässig zu halten. Die Gruppe sollte das Kiosk-Szenario, das Besitzmodell der Geräte und das zugehörige Konfigurationsprofil klar beschreiben.
Bevor du diesen Ansatz produktiv einsetzt, solltest du die Gruppenmitgliedschaft, die Profilzuweisung und das Check-in-Verhalten der Geräte auf einigen wenigen Testgeräten validieren. So lassen sich Zuweisungsprobleme leichter von Problemen mit der Kiosk-Shell oder der Anwendungskonfiguration trennen.
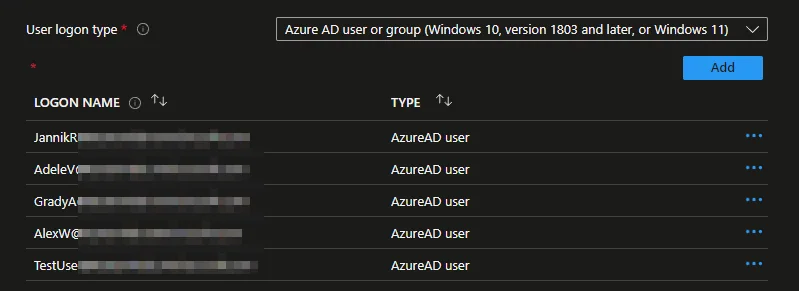
In einem früheren Blog habe ich bereits beschrieben, wie man ein Gerät als Kiosk-Gerät mit Intune bereitstellt. Das funktioniert tatsächlich richtig gut. Es gibt nur eine kleine Sache, die wirklich unpraktisch ist. Wenn als Anmeldetyp ein Microsoft Entra ID (ehemals Azure AD) Benutzer oder eine Gruppe ausgewählt wird (nur bestimmte Benutzer dürfen sich an diesen Geräten anmelden), muss diese Richtlinie nicht nur einer Gruppe zugewiesen werden, sondern die erlaubten Benutzer müssen zusätzlich im Profil definiert werden.
Die Option erlaubt es zwar, Microsoft Entra ID Benutzer und Gruppen hinzuzufügen, und die SIDs dieser Objekte werden in die lokale Gruppe geschrieben, aber Windows kann die Microsoft Entra ID Gruppen nicht auflösen (Bug oder Feature?). Die Auflösung, ob der Benutzer, der sich anzumelden versucht, Mitglied einer der Gruppen ist, erfolgt durch Windows über Graph; bei deaktiviertem MFA funktioniert das. Ist MFA jedoch aktiviert, gelingt es Windows nicht, das Token abzurufen.
In diesem Blog möchte ich dir zeigen, wie du dies ganz einfach umgehen kannst, indem du eine Microsoft Entra ID Gruppe mit diesem Konfigurationsprofil synchronisierst.
App-Registrierung erstellen
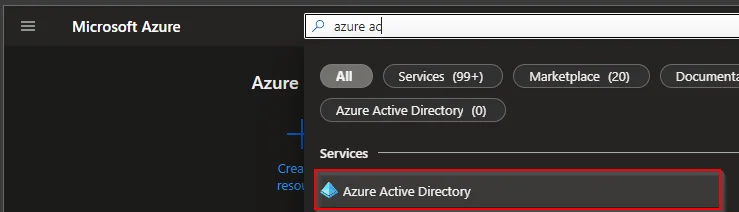
- Suche nach Microsoft Entra ID
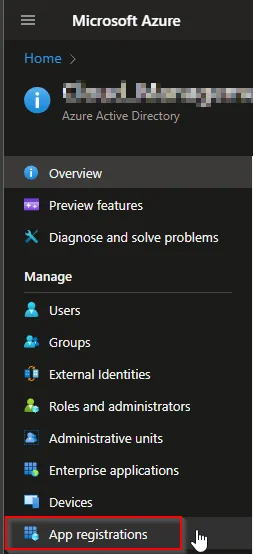
- Wähle App registration
- Wähle +New registration
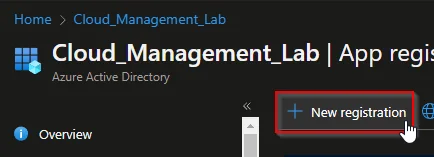
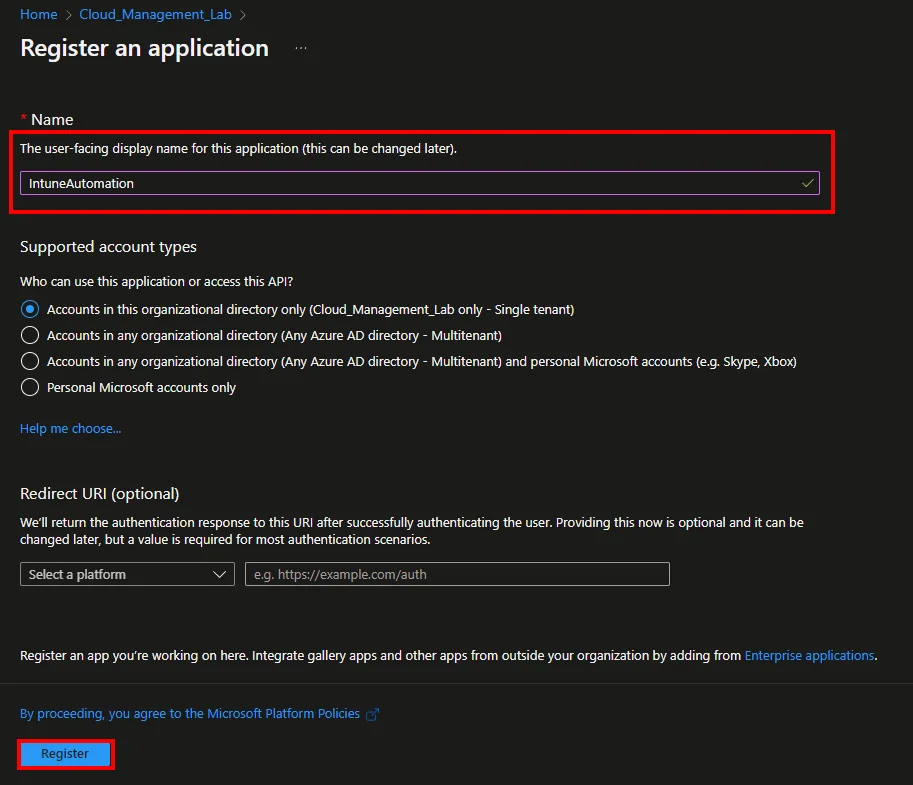
- Gib einen Nameein und klicke auf Register
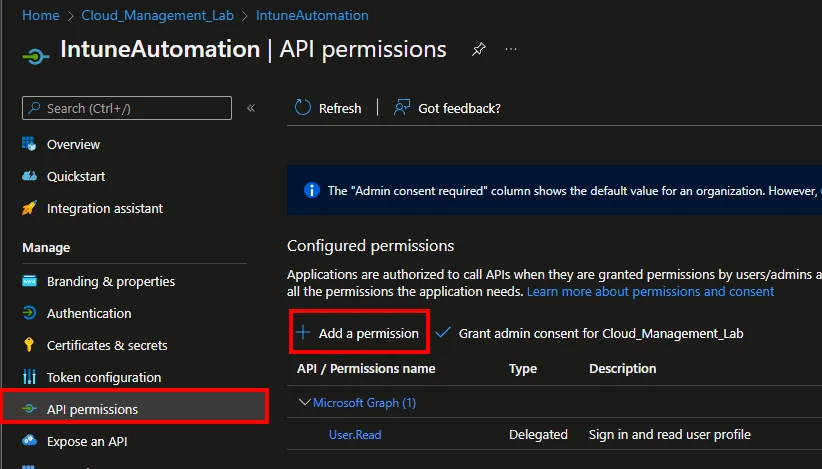
- Klicke auf API permissions und +Add a permission
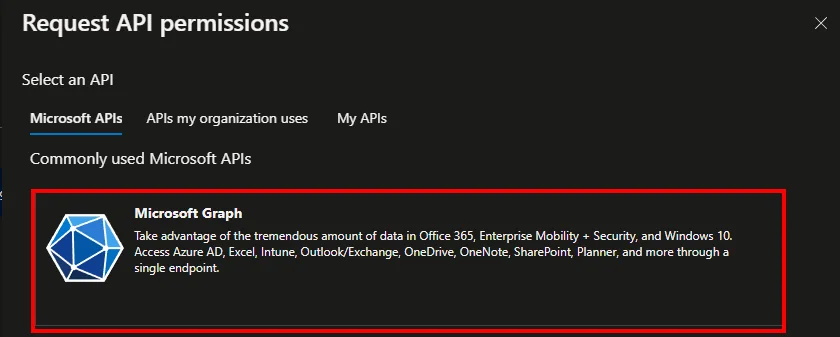
- Wähle Microsoft Graph
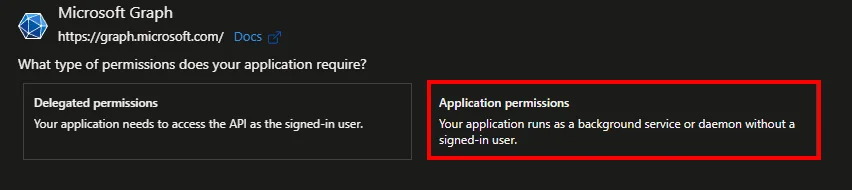
- Wähle Application permissions
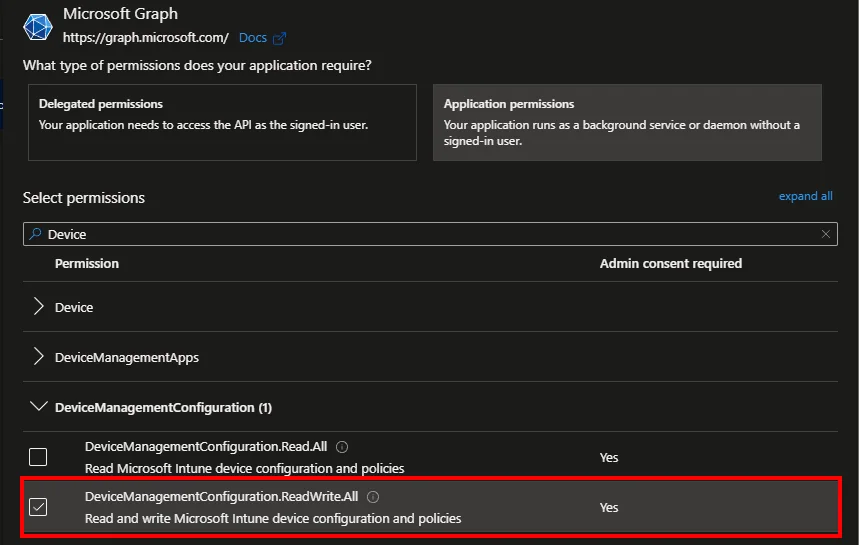
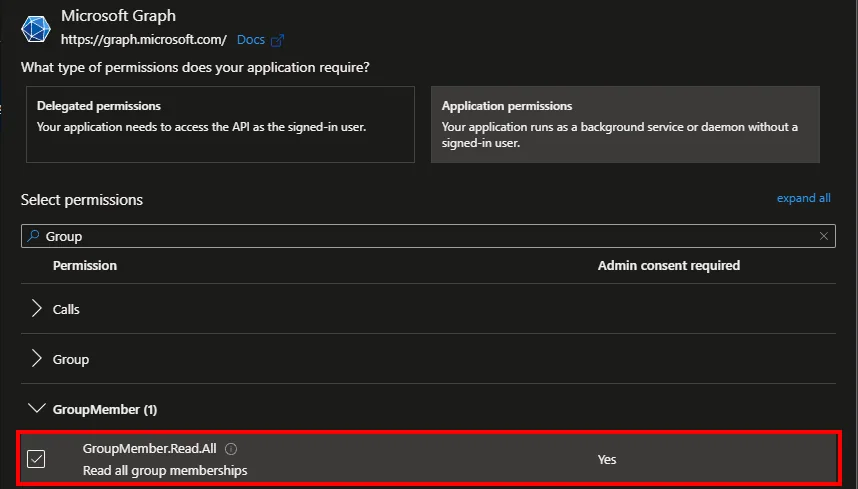
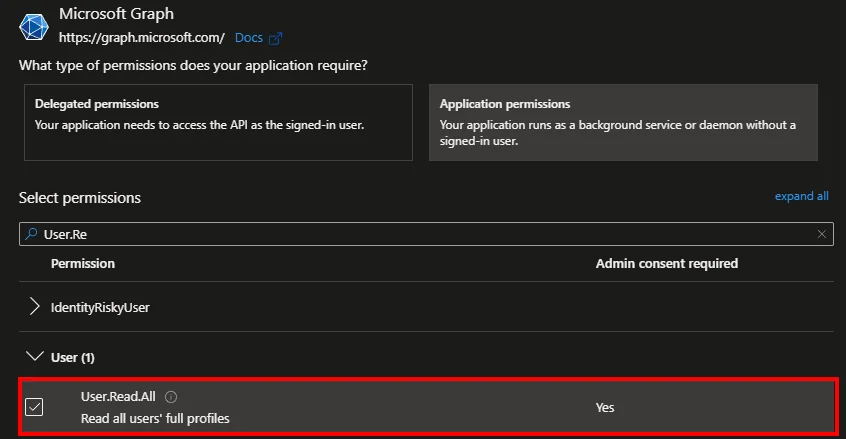
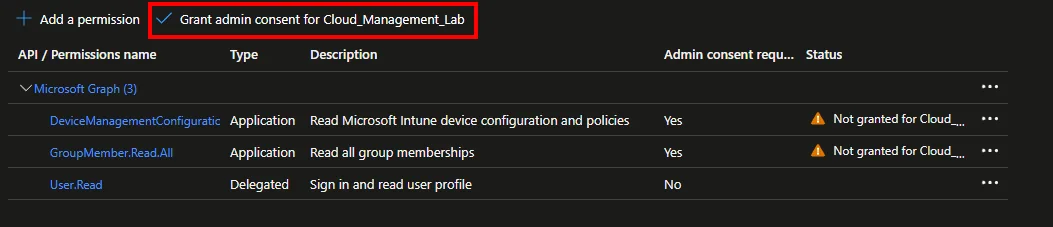
- Suche nach DeviceManagementManagedDevices.Read.All und GroupMember.Read.All
- Klicke auf Grant admin consent for *** und bestätige mit Yes
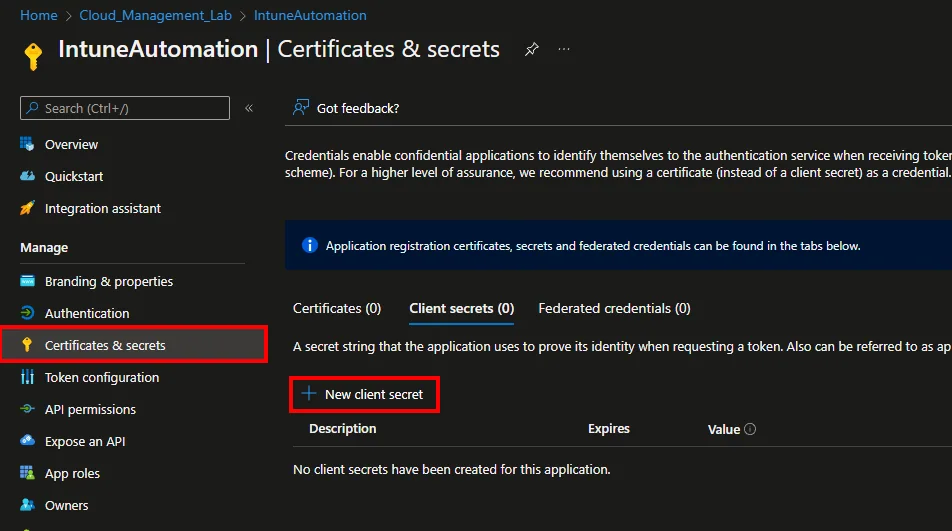
- Wähle Certificates & secrets und klicke auf +New client secret
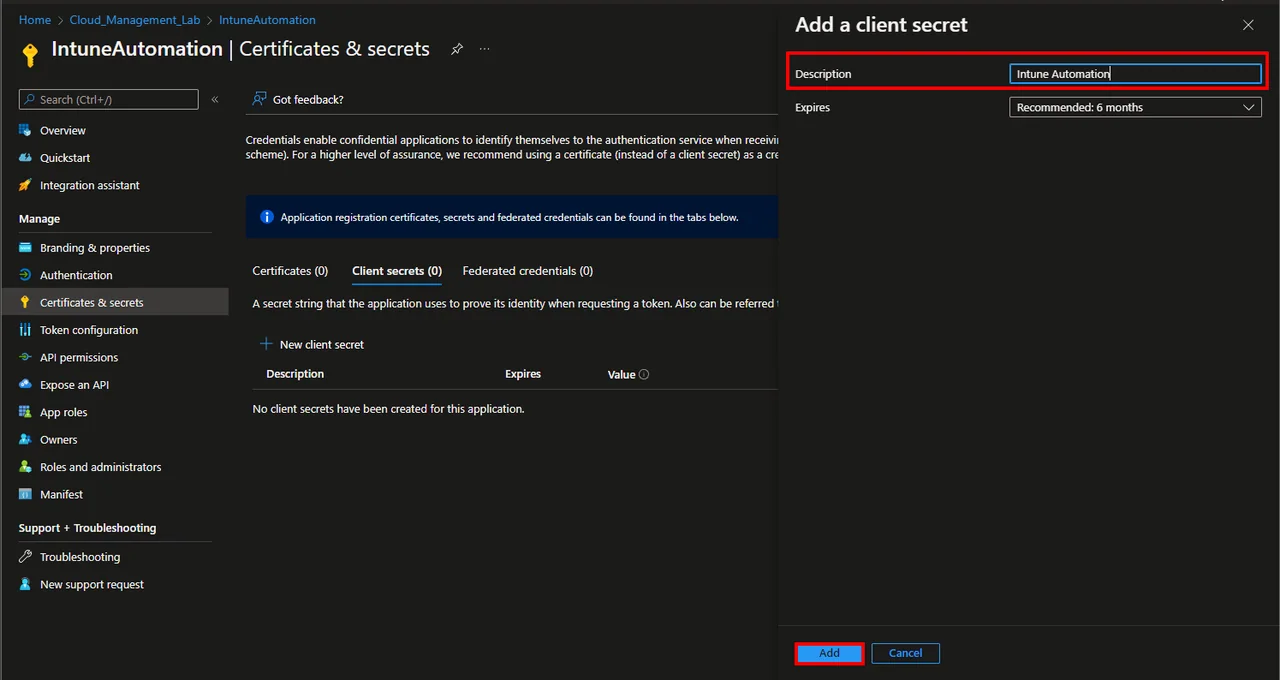
- Gib eine Description ein und wähle eine Expires time
- Klicke auf Add
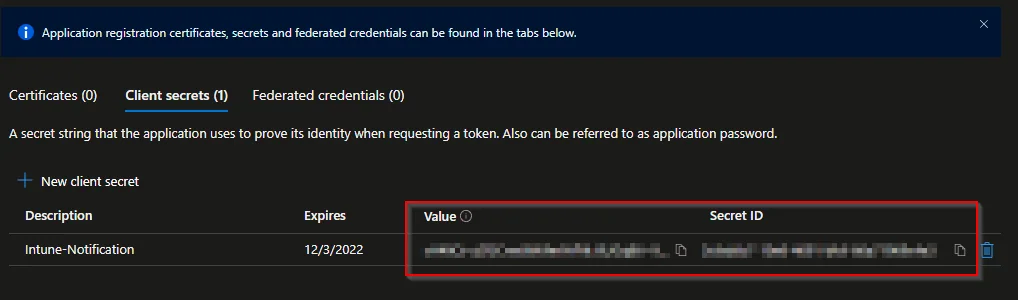
- Kopiere und speichere den Value und die Secret ID
Automation Account erstellen
- Suche nach Automation Accounts
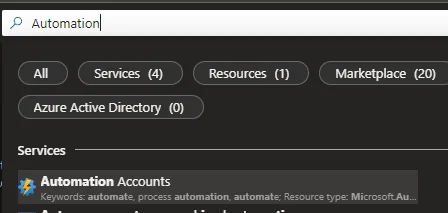
- Klicke auf + Create
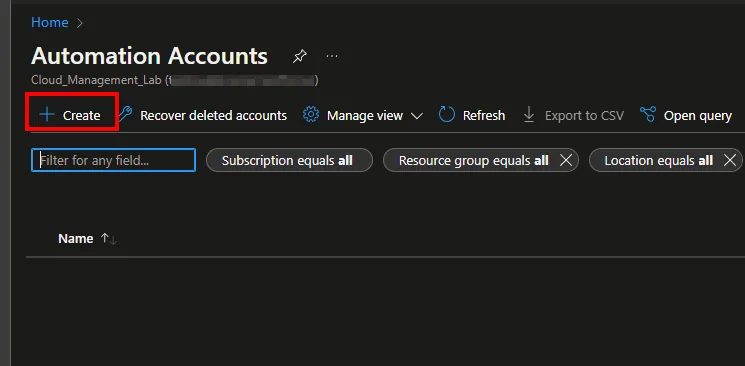
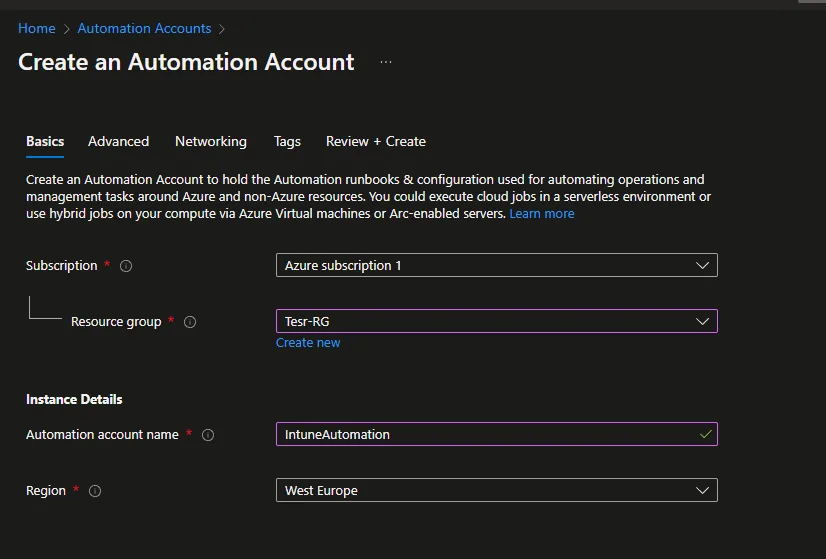
- Wähle eine Subscription und eine Resource group
- Gib einen account name ein und wähle eine Region
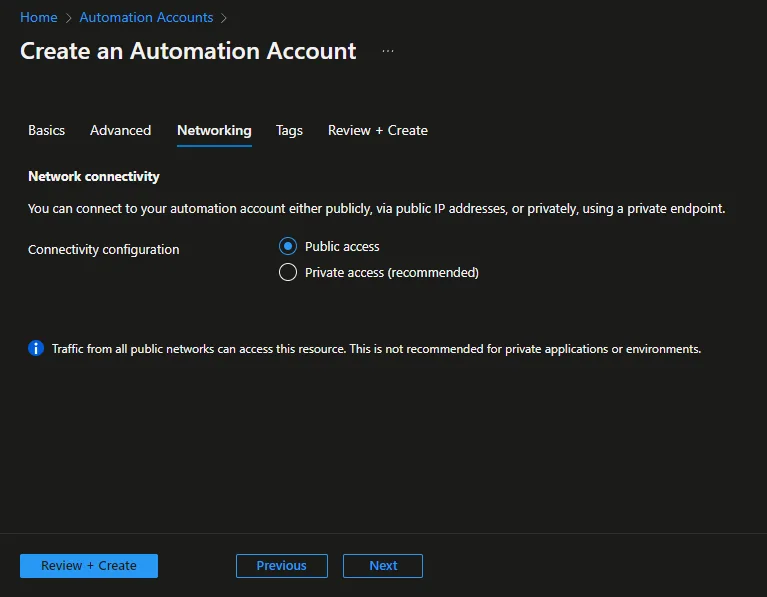
- Klicke auf Next
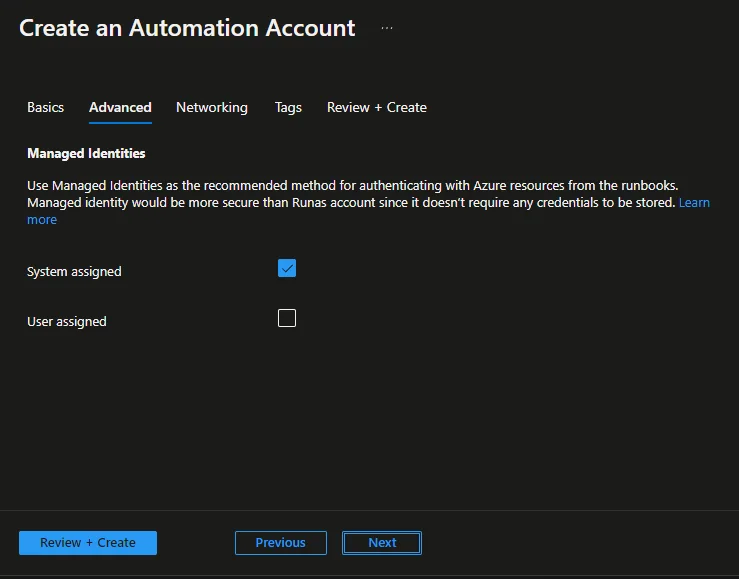
- Klicke auf Next
- Klicke auf Next -> Next -> Create
Das Runbook erstellen
- Öffne den Automation Account
- Navigiere zu Variables und klicke auf + Add a variable
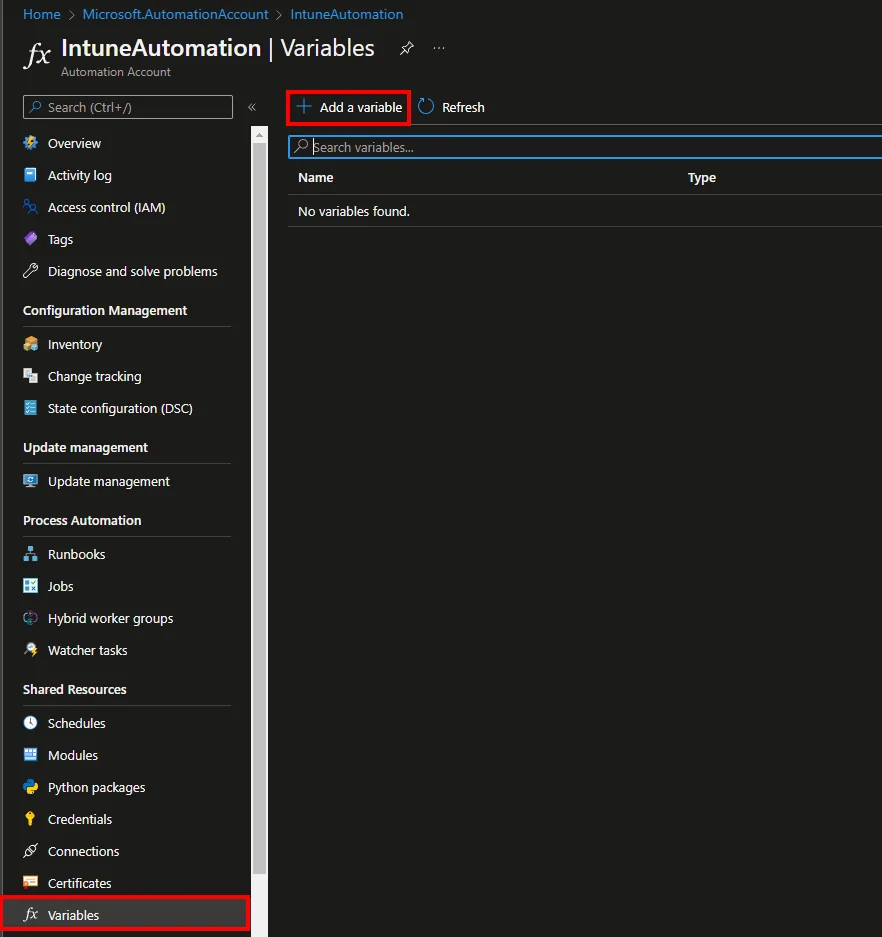
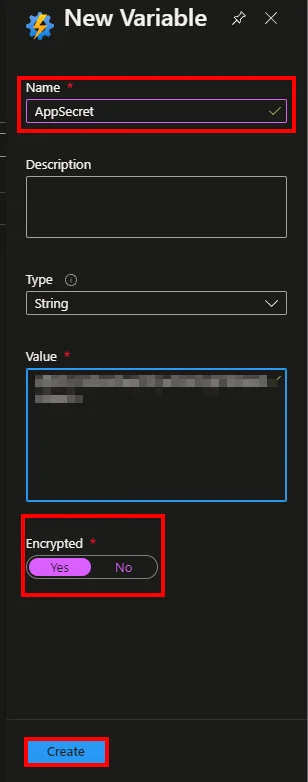
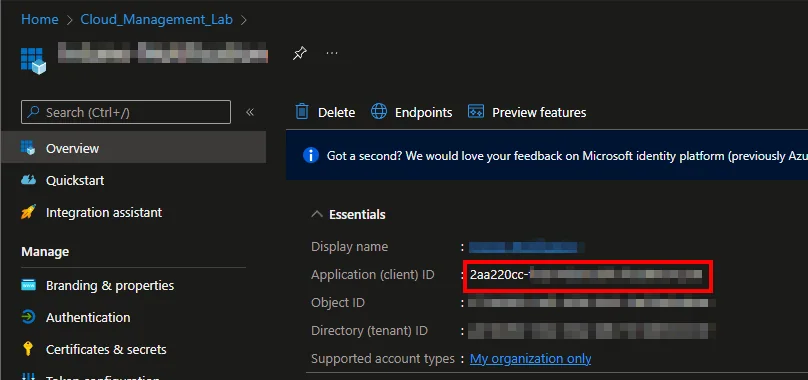
- Füge den Secret Value und die App ID als Variable hinzu
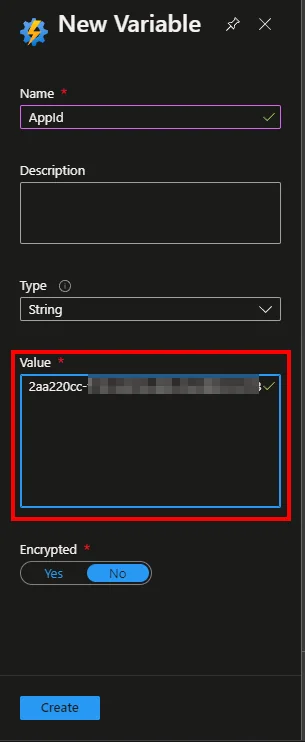
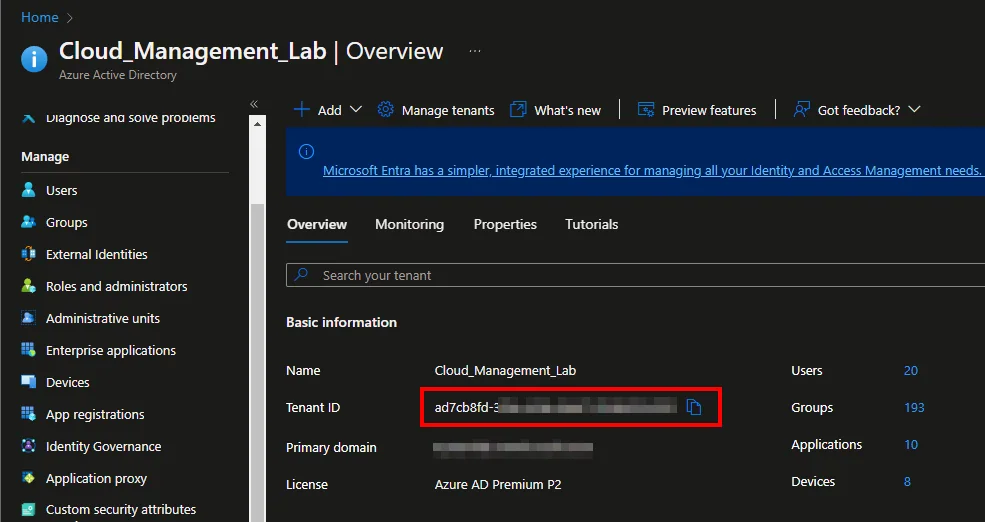
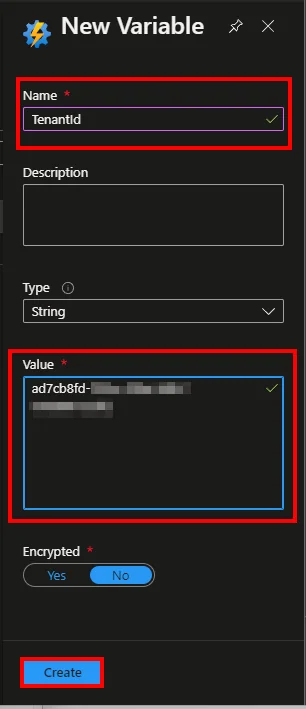
- Wähle Runbooks
- Klicke auf + Create a runbook
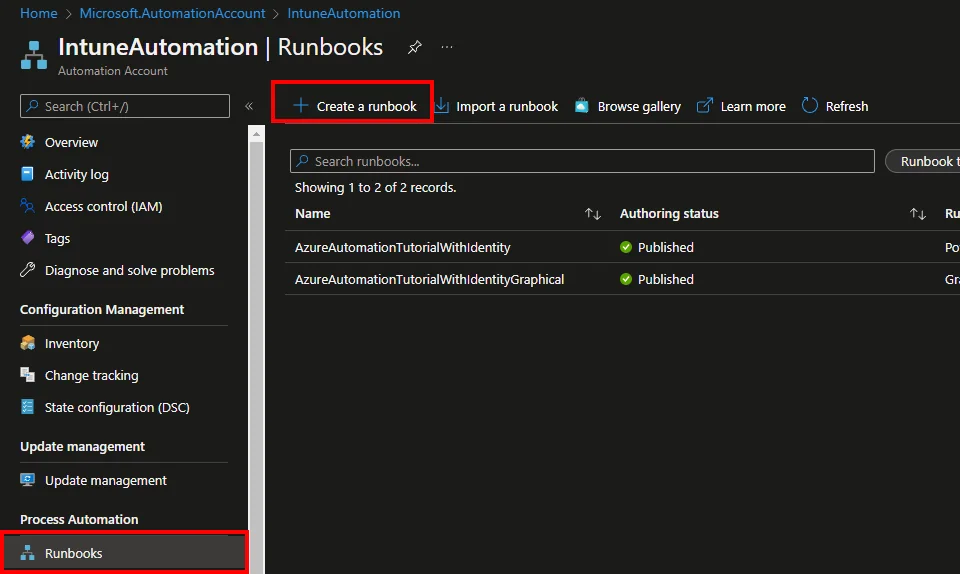
- Gib einen Name ein
- Wähle PowerShell als Runbook type
- Wähle 5.1 als Runtime version
- Klicke auf Create
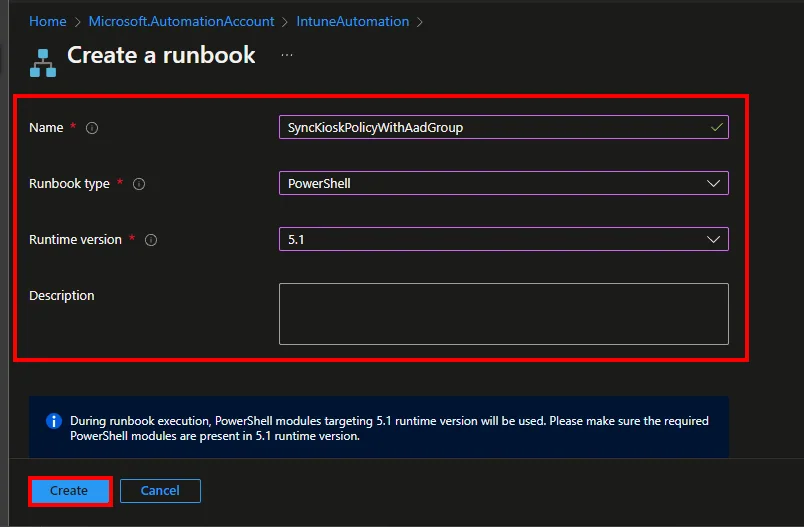
- Füge das Skript aus meinem Github-Repository ein
- Gib die profileId und die groupId ein
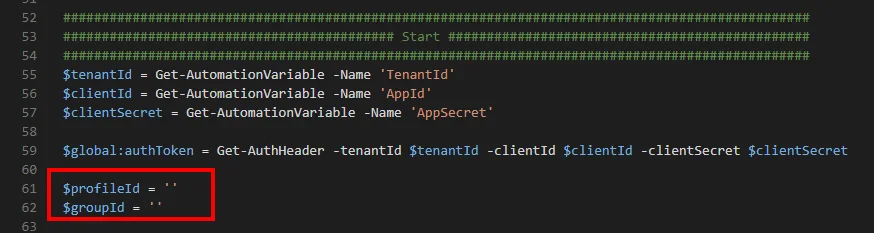
- Speichere und teste das Skript
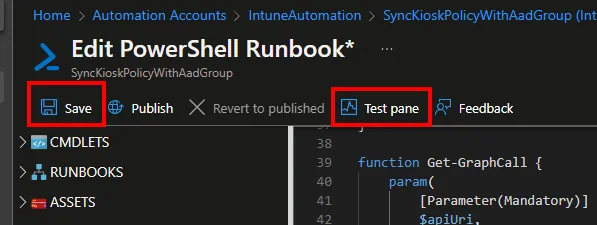
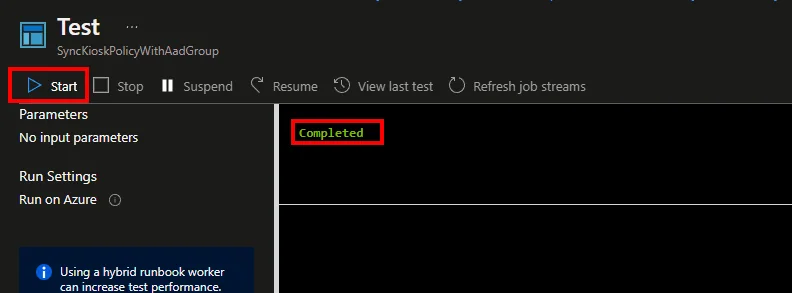
- Klicke auf Publish

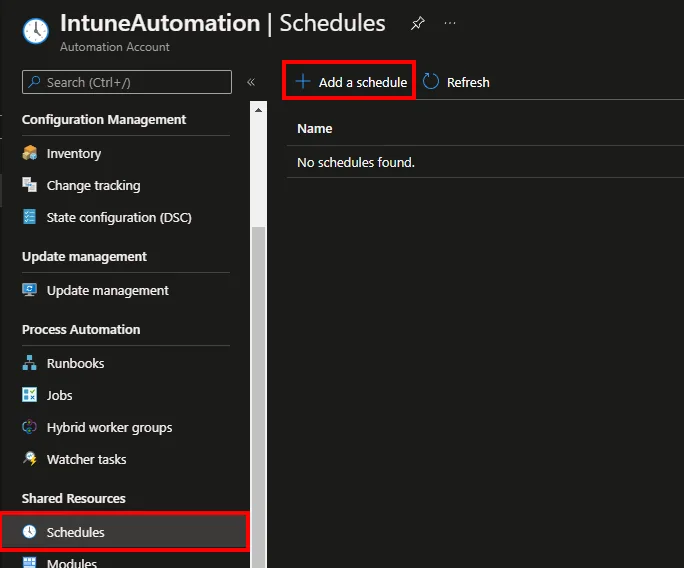
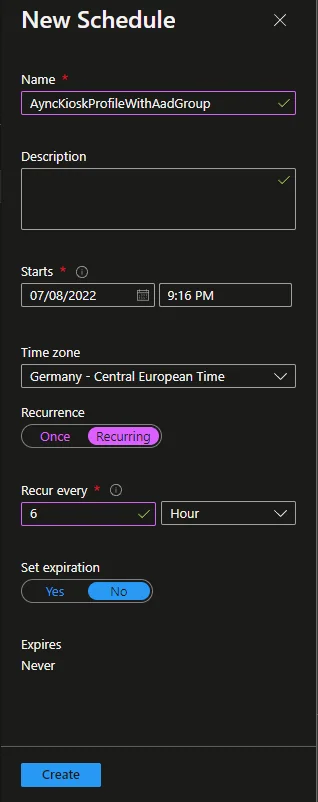
- Navigiere zu Schedules und klicke auf + Add a schedule
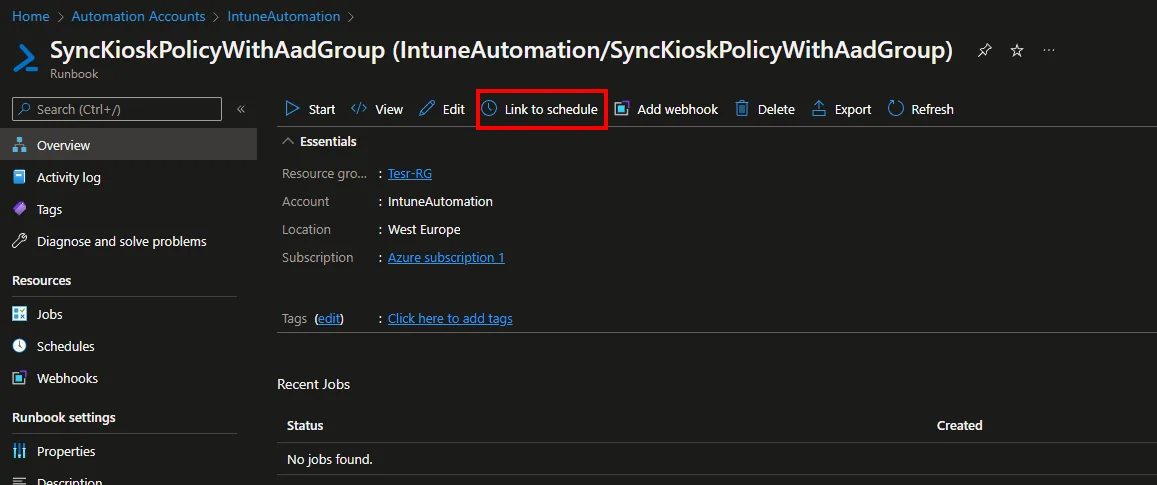
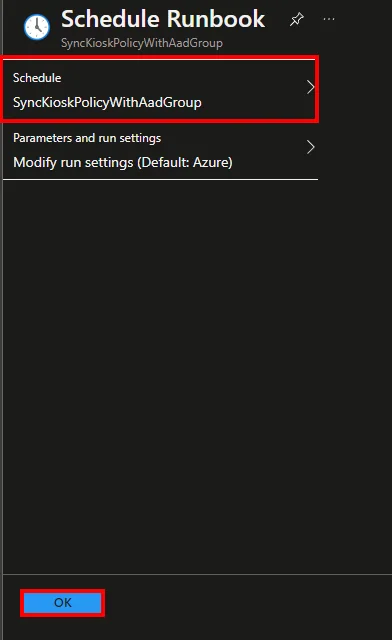
- Klicke auf Link to schedule und füge den erstellten schedule hinzu
Häufige Stolpersteine
Ein paar Dinge führen beim ersten Einrichten häufig zu Problemen. Am häufigsten werden delegierte statt Anwendungsberechtigungen auf der App-Registrierung vergeben: Da das Runbook ohne angemeldeten Benutzer läuft, funktionieren nur Anwendungsberechtigungen mit erteiltem Admin-Consent. Prüfe daher, dass sowohl DeviceManagementManagedDevices.Read.All als auch GroupMember.Read.All einen grünen Consent-Status anzeigen.
Der zweite Stolperstein ist die Verwendung der falschen Kennung im Skript. Die profileId muss die ID des Kiosk-Konfigurationsprofils sein, nicht die der Zuweisung, und die groupId muss auf die Microsoft Entra ID Gruppe verweisen, deren Mitglieder sich anmelden dürfen. Denke außerdem daran, dass die Änderung immer nur so aktuell ist wie dein Zeitplan: Läufst du das Runbook einmal pro Tag, muss ein neu hinzugefügter Benutzer unter Umständen bis zum nächsten Lauf warten, bevor er sich anmelden kann. Wähle das Intervall also passend dazu, wie schnell in deinem Team neue Mitarbeiter aufgenommen werden.
Fazit
Azure Automation ist ein sehr cooler Dienst, um Aufgaben in Intune/Azure per Skript zu automatisieren. Ich hoffe, dieser Blog hat erklärt, wie Azure Automation funktioniert, und dir geholfen, eine Microsoft Entra ID Gruppe mit einer Kiosk-Richtlinie zu synchronisieren, ohne jedes Mal manuell Benutzer hinzufügen zu müssen.
Bleib gesund, Cheers
Jannik